You can easily put more text into a cell than will display properly and while you can widen your column to make the text fit, there are some instances where this might not be advisable. Instead, you can wrap your text within the cell such that your cell height will be increased to display all your text.
Follow the steps below to learn now:
- Select the cells whose formatting you would like to affect.
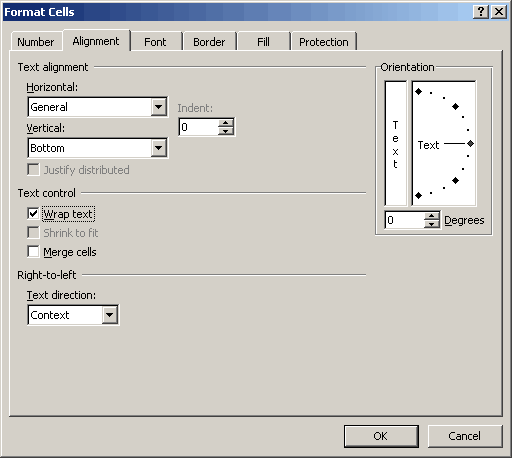
- Click CTRL + Shift + F to display the Format Cells dialog.
- Click on the Alignment tab.
- Be certain the Wrap Text check box has been selected.
- Click OK .
Remember now, that your row height will only increase automatically if you have not explicitly specified the row height.
If the row height does not expand to fit the contents of your cell, after following the steps above:
- Select your row.
- Be certain the Home tab of your Ribbon is displayed.
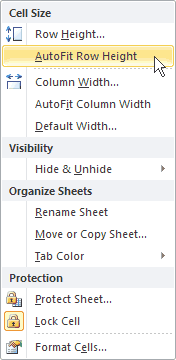
- In the Cells group, click Format to display a drop-down menu.
- Select AutoFit Row Height.
Your text should now be wrapped within your cell and displayed properly.


