My mother asked me to print up a birthday card with some dogs on it. I thought she said for my nephew, but it turned out to be for his dog. It had to happen. 🙂 I wrote before how I use OpenOffice Writer to create greeting cards.
Read here: How To Create Greeting Cards In OpenOffice
But one thing I don’t like is the wide border that this puts around the result. It makes centering the images very awkward to work with. My printer is supposed to support borderless printing, so I started searching for a way to fix this issue.
I went into OpenOffice to see if there were any settings there. I found the settings for adjusting the margins and that did the job. The following instructions work for both OpenOffice and LibreOffice.
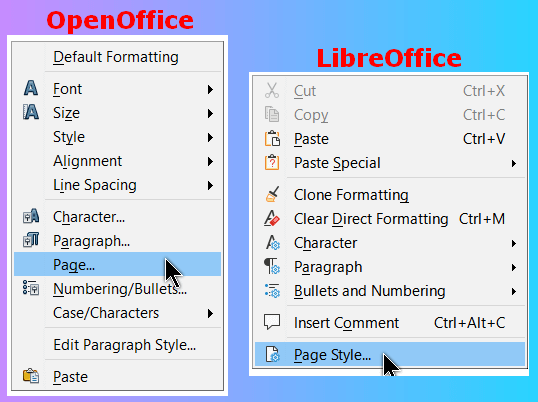
Right-click on a blank page. In OpenOffice click on Page in the menu that opens. In LibreOffice, click on Page Style.
Then click on the Page tab in either one. From here, the layout and instructions are identical.
Look in the Margins section. In both OpenOffice and LibreOffice on my system, the default settings were all set to 2.00cm. So I tried first to set them all to 0.00cm. but when I clicked on OK, I got an error message that The margin settings are out of print range. Do you still want to apply these settings?. I clicked on No. If I set them to zero in LibreOffice, I get no error message.
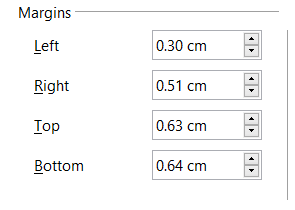
Then I noticed OpenOffice had filled in the Margins with its own values: Left 0.30cm, Right 0.51cm, Top 0.63cm, and Bottom 0.64cm.
So I left them at that and it worked. With most of the border gone, it made centering the images a lot easier.
—


