There are groups on Facebook dedicated to selling whatever you have to sell. Like a Buy and Sell forum or a flea-market online. A woman called me because she regularly uploaded to one of these groups and she saw others who had the prices embedded right on the picture. She wanted to know how to do it.
I didn’t have a clue. I uploaded nothing to these groups but a little clicking around and I found out what to do. Sign in to Facebook and down the left-hand side menu, find and click on one of your Buy and Sell groups. You should see a two-line box that has a green price tag icon and the wording Sell Something and just below, What are you selling?

When you click on What are you selling, you get a pop-out box that asks you to fill in the details like descriptions, prices, and to add photos.
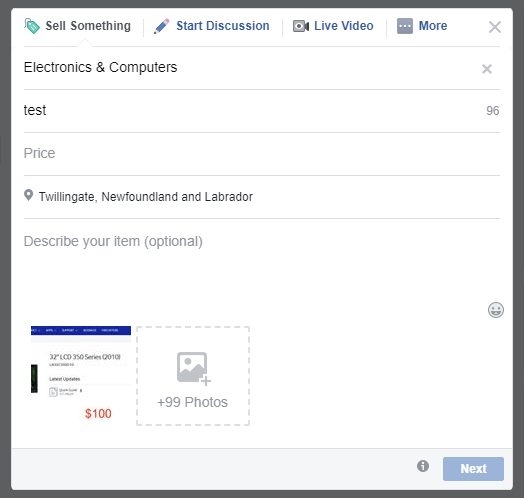
For this example, I will use a picture of our main TV. And I will add a $100 price tag.
First, I would click on the Photos icon toward the bottom and upload my picture. Then when you hover your mouse over the picture once it’s uploaded a pencil symbol appears with the wording Edit Photo. This will take you to the photo editor.
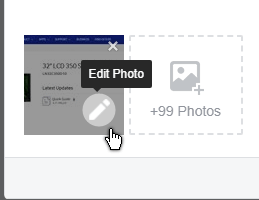
When the photo editor opens you have some choices that allow you to alter your photo.

- Filters: click on one in the boxes and it changes the look of the picture slightly
- Tag: Tag friends
- Crop: Crop the image
- Text: Add text
- Alt text: Add alternative text for visually impaired
- Stickers: Like emojis
Right now I just want text so I click on the Aa Text option then Add Text at the top left-hand corner. You can use the colour bar to change the colour of the text, Justify the text, left or centered, and change the font by clicking the box marked Arial.
When you click on Add text a text box appears and this is where you type. In my case, I just typed $100 and in the colour bar, I click on a red area to change it to red.
If you click inside the text box and hold down with your mouse, you can drag the text anywhere on your picture. The X is to cancel and the blue circle with the two-sided arrow in the top right-hand corner of the text box allows you to rotate the text if you want to get artistic.
When all is said and done, click on Save or if you changed your mind, click on Cancel.
When you save it, you’ll end up back at the Sell something box where you can add other pictures as you want. You must edit each picture individually. When finished, click on Next.
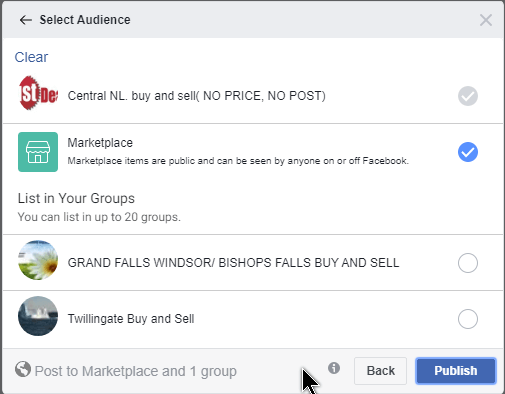
This takes you to a box to Select Audience. Pick the group(s) that you want to see your post. Then click on Publish.
FURTHER READING:
—