
Since my last article, Change Reply Default in Outlook Web App, was about the Outlook 365 web App, I thought I would share another tip in this area. What amazing tip will I be sharing today? We are going with how to add an Email Signature to our email. I email people for my work and I needed to set myself up with an email signature. (Yes, we all need to have this, especially if you send email as much as I do). It is like having a business card attached to your email. So, how do we set one of these up on our Outlook 365 online App? Grab a pencil and get ready to learn.
How To Add An Email Signature To Outlook Web App
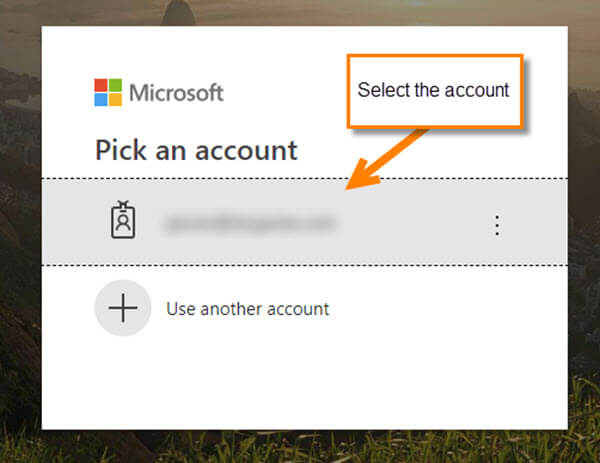
Step 1: Log in to your Office online account. Head over to office.portal.com to log in. Pick the account you wish to work with. I say this because I know many clients who have more than one Microsoft Office 365 account.
Step 2: Once logged in to the right account, find the Outlook App icon under the Apps section. Click it.
![]()
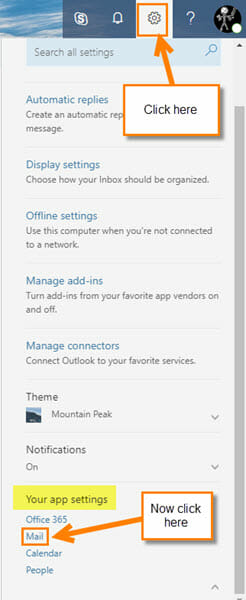
Step 3: Now that we are in the email, head over to the top-right and click on the Gear icon. In the menu, look to the bottom and click on Mail.
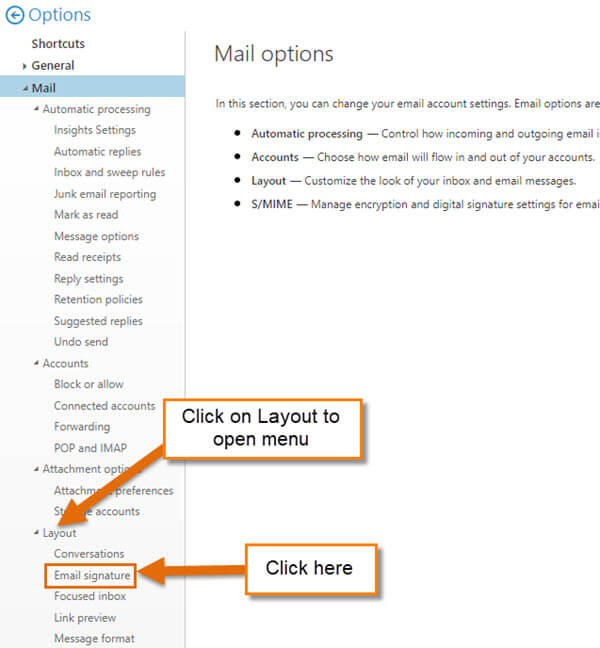
Step 4: On this screen, look to the left menu under the title Layout. Here you should see a sub-menu which you will want to choose Email signature from. If you do not see the sub-menu, click on Layout title. This will bring up the sub-menu for Layout which includes Email signature. Now you should be able to click on the Email Signature option which is the second one down.
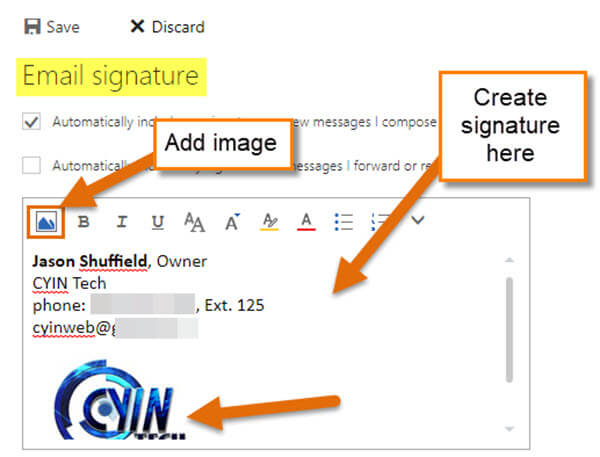
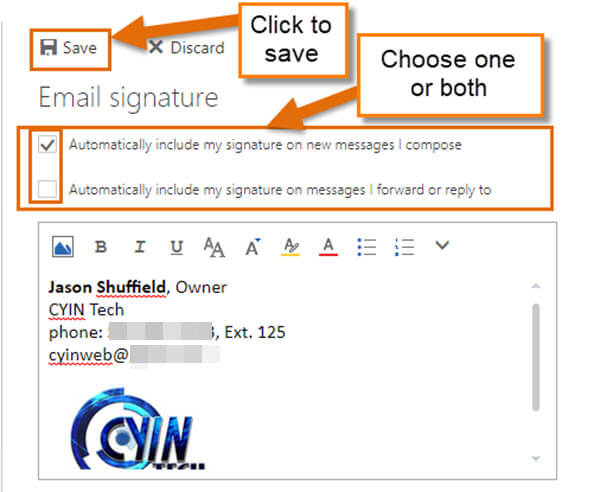
Step 5: This is where all the magic happens. Here you will see a text box to create your signature. You can even add images by clicking the Insert Picture option. It’s easiest if you have your signature previously saved as an image– then all you have to do is insert it by clicking the add image option on the far left. You will have to get in here and mess around to get your signature exactly the way you want it.
Step 6: Once you are done creating your masterpiece, you have some options before hitting Save. If you look above the text box, you will see two choices:
- Automatically include my signature on new messages | compose
- Automatically include my signature on messages | forward or reply to
Check the one you want or choose both. Once you have decided, click Save at the top. Done!
Now it is time for you to add your personality to your email. Do you prefer to have a signature on your email, or not?
Here’s a short video demonstrating the process:
To watch more How-To videos like this one, check out our Dave’s Computer Tips YouTube Channel. We’ll be adding more videos in the future.
—
Based on the title, I wouldn’t have expected the article to be about the Outlook Web App. But of course that’s not your fault. Microsoft now has the Microsoft Outlook computer based program, Outlook Web App program equivalent (I think), and the outlook.com email addresses.
(Ed note: I changed the title due to length constraints, so you can blame that on me.)
Richard