I recently bought my sister’s old tower. It’s a Gateway DX4380 with 6GB of memory. She hasn’t used it for years and it had an old version of Windows 10 installed which I updated to the latest version.
When I set up my computers, I always use a local account. But I don’t like the security questions asked for a local account password. So, during the installation, I chose the option not to add a password. I was going to do it later at the command prompt.
So here’s how to change or add a password at a Command Prompt.
Command Prompt
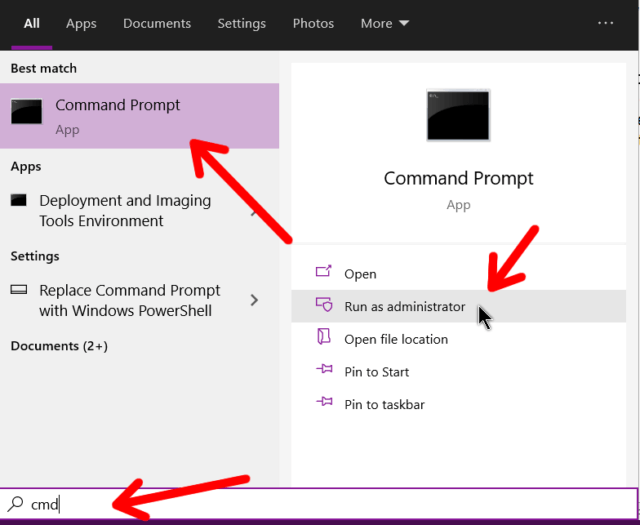
First, type cmd in the Search bar. When it appears in the list, click on Run as administrator.
Then type the following and press Enter: net user
This will help you isolate your account names. In my case, it’s just Terry. Then type the following, hitting Enter afterward. Replace username with your account username and type in your desired password: net user username password
And that’s it. You should get a message saying The command completed successfully. This way, it shows you the password you are typing. If you don’t want your password displayed when typing it, say you’re in a crowded environment and there might be someone looking over your shoulder, type the following, and be sure to put in your user account name for the username:
net user username *
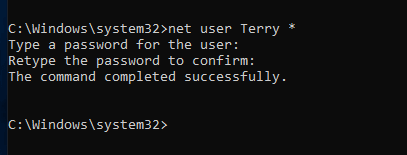
In my case, I typed net user terry * and hit Enter. Note that there is a space between the Username and the star (asterisk) at the end.
Then it will prompt you for a password. Type it in but you will not see anything being typed, not even stars, that’s the way it should be. Press enter when done and then retype it and press enter. If done correctly, you should get the message, The command completed successfully.
This is for local accounts only and not Microsoft accounts.
—


Terry,
Thanks for the info..
Regards,
James Douglass
Garden City, Kansas