A few weeks ago I wrote an article on How To Change Animation Timing In PowerPoint. This was due to my work asking me to create a presentation with Office 365 PowerPoint. With being stuck at home, I have more time to do this time-consuming job (at least if I can keep my kids from bugging me too much!). I thought I could share some more tips on creating PowerPoints with Office 365. This week, I will be showing you how to add Audio/Music to your project to make it more fun to watch. Plus, it should keep the people you are showing it to more interested. Trust me, having dead air is not a good thing in any slideshow or video. Now get on to those computers and let us get started.
How To Add Audio To PowerPoint Presentation
I will be showing you how to do this in the Office 365 PowerPoint Desktop App. As with my last article on this, it only can be done in the Desktop App and not in the Online one. They should make all features available in both versions in my opinion.
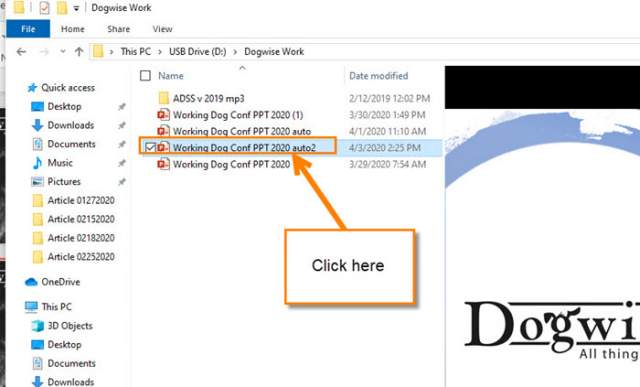
Step 1: The first thing we want to do is open the presentation on your computer. You can find it through your File Explorer or Open the PowerPoint software. Once the software opens, you should see the last project you were working on. Click on it to open the presentation. If you do not see it, find the file on your computer and open up the presentation. Either way, we need to be in the PowerPoint that you want to work on.
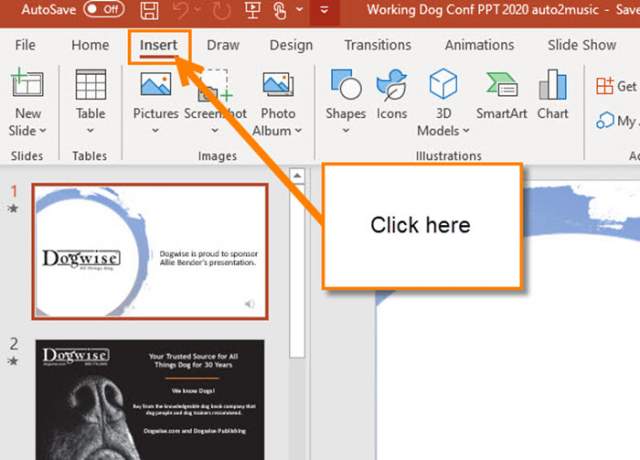
Step 2: Once the presentation is open, look to the top next to the Home Tab. There you will see to the right of it, Insert. Click it.
Step 3: Now look to the far right on the menu Ribbon at the top. Here, you see a section labeled Media. The middle option is the one we are looking for, Audio. Click on the Audio option.
Step 4: This will bring up a little drop-down menu. Here there are two choices:
- Audio on My PC
- Record Audio
For this article, we are going with the first option. Click on Audio on My PC.
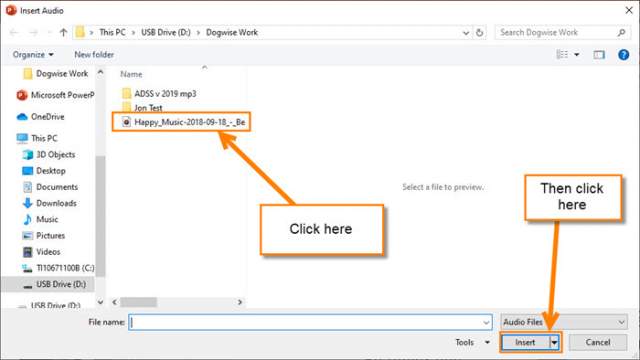
Step 5: This will open up your File Explorer. From here, find the audio file you want to insert. Click on it and then click the Insert button at the bottom.
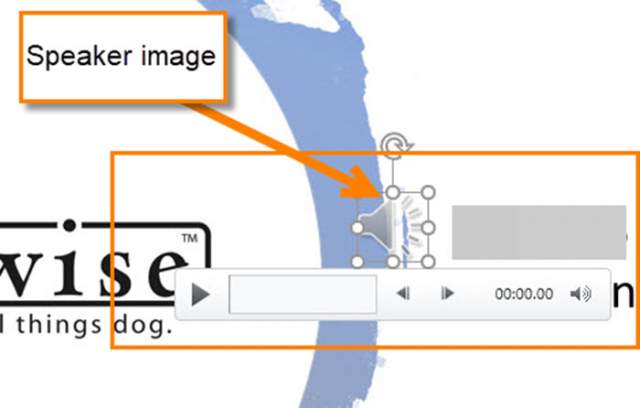
Step 6: The Speaker icon will now appear on your slide. Click once on the speaker and by doing that you will see you can play the audio on the screen. From here you can make sure you have chosen the right audio file.
Step 7: Since you have selected the audio speaker icon on the slide, it should give you an audio edit menu at the top. If not, all you will need to do is look to the top and at the far right and click on the Playback tab.
Side Note: You will notice that I have pointed out the other option which is Audio Format. You can check that out but I found it not to be that important in my Presentation. This area is more to do with how your Speaker icon is displayed. Now back to the editing portion of the Audio.
This is how you can edit the Audio you have selected. As you can see there are a few things you can do here:
- Trim Audio
- Fade Duration
- Audio options (this area lets you set when and how long your audio will play)
- Audio Style
Those are the editing options that PowerPoint 365 lets you use. After you have finished adding and editing the audio, make sure to save your work.
That is all you need to do to add some audio to that amazing PowerPoint presentation you have been working on. Now, get in there and add some sound.
—


In one powerpoint I had inserted a musical audio file. But it will not stop even when the presentation stopped. in fact I had to stop power point application to stop it. . Funnily all audio options got greyed out and not accessible. Ultimately I had to delete the file.
Hi Shobha,
I have never had that happen before. Has that ever happened again? Hope not, that would have driven me nuts. Thanks for sharing that with us. 🙂
Jason