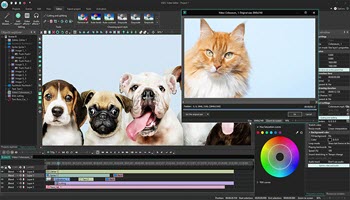
My Uncle sent me a video that he wanted me to change the background on and put in a slide show of pictures. Way beyond what I can do, but I found another solution. Have you seen videos online where someone is talking and you see a small thumbnail version of them in a corner with a separate video running in the background?
The video that was sent me was a portrait version with space at the top– perfect for another video. I used the VSDC Free Video Editor for this project.
Download, install, and open up the editor. Click on the Blank project icon and in the Project settings box that opens, just put in a title and click on Finish. You can get more creative with these settings if you want.
To add your videos, click on the Add object button (a green circle with a white cross in it). This opens a menu to pick your videos.
Pick your first background video. Then pick the second video that will lay on top of the first one. When I added each video, I got a pop-up box with several options. I just clicked on OK in both instances.
Click on the video on top and you’ll notice a dashed border surrounding the video. Click on one of the little squares (grab handles) to drag and resize the video. Click and hold down on the center of the top video and you can drag it where ever on the background video you want. The blue square in my picture is for the top video in my project.
Now you might want to preview the video before saving it. Click on the Projects tab across the top and then click on the second to the last button to the right labelled Preview scene.
You’ll get a pop-up video player to preview your video. If you’re satisfied with the result, then it’s time to save it. Click on the Export project button right next to the Preview button.
Like other programs such as this, there are presets for different devices (the top left-hand block named Select media device). Use the arrows on the right-hand side to scroll through your choices or just select your output format in the Select output video format section.
In my case, I just clicked on To MPG (this one was going on Facebook). If you want to, towards the bottom of the window, click on the Change name… button. This allows you to change the name of the video and choose what folder to save it in.
Then towards the top, the last button over to the right, click on Export Project.
In my case, I then had two progress bars in the top left-hand corner, so it was just a matter of waiting for it to finish.
And then it’s done. Enjoy your videos.
FURTHER READING:
-
How To Add Subtitles To Your Videos
-
How To Create A Time-Lapse Video
-
How To Build A Video With Photos
—

