
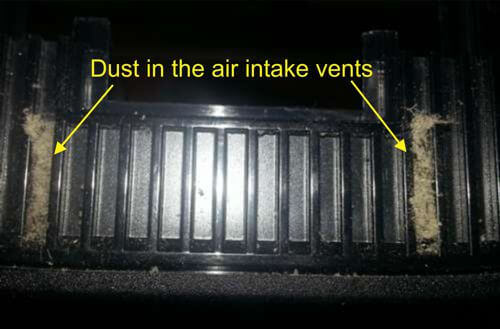
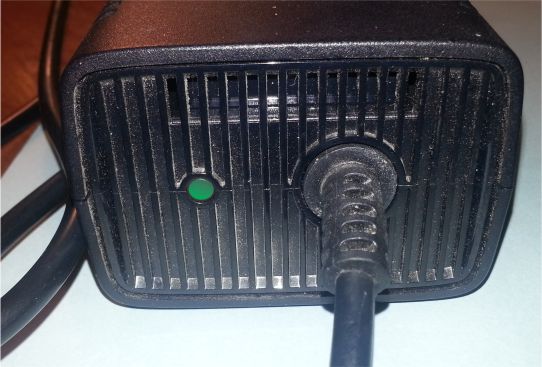
 The first sign you have a problem with your Xbox Power Brick is when the red light appears. If you leave your Xbox on long enough, it will collect dust over time. The power brick acts like a small vacuum cleaner and slowly sucks up dust into the brick’s interior. When the dust in the air vents builds up enough, it will begin to overheat and shut down.
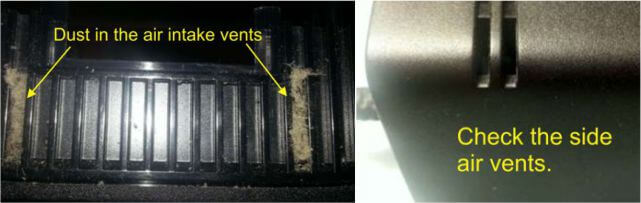
Check All The Air Vents
One sure sign is to check the air vents on the brick and see if they are filled with dust. If they are, you might get away with clearing the dust out with some compressed air from a can. This will work if the dust is only concentrated in the vents and preventing air from circulating through the brick. I find that it is best to use the side vent when blowing out the dust.
However, if the dust has made its way into the brick and has packed in over time, it will require a little more work. This tutorial will show you how to open the power brick, remove the accumulated dust and put it all back together like new.
Tools
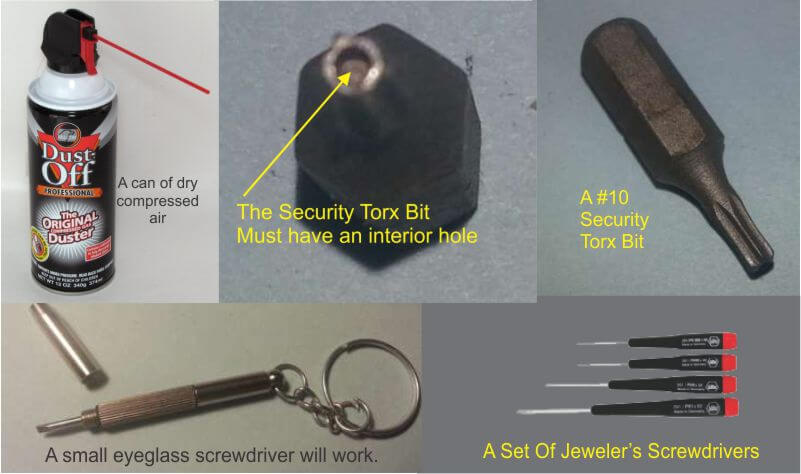
- A Can of Compressed air (Optional)
- A #10 Torx Security Bit. (Mandatory)
- A jeweler’s Philips screwdriver or small blade driver
- You may substitute a small flat blade like an eyeglass screwdriver
 Procedure

- Unplug the power brick from the power outlet and from the Xbox.
- Inspect the brick visually and if you do notice dust build up in the air vents, bring the brick outdoors and give it a few blasts with the compressed air.
- Reattach the brick to the Xbox and give it a try, if the light turns yellow and then green when the Xbox is on, you might be OK. Time will tell, if your Xbox stays on, you are probably done and do not need to continue with the rest of this tutorial.
- If the red light does appear again or remains on, you will have to dismantle the power brick and clean the interior.
Disassembly
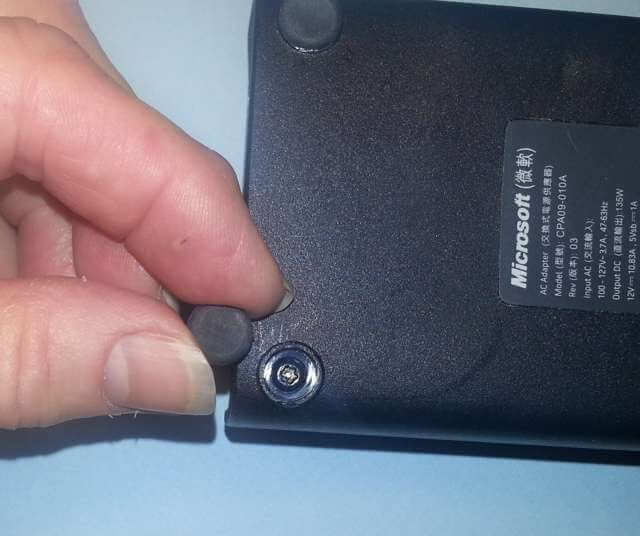
The power brick has 4 rubber foot pads that will have to be carefully removed.
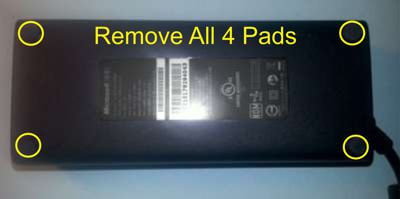
Wedge the screwdriver underneath the foot pad and slowly pull up until the pad is removed. Note; this may take some force just make sure you have the full blade under the pad.

Remove all 4 pads, this will give you access to the 4 #10 Security Torx screws holding the case together.
Remove the top section and lay each half side by side.

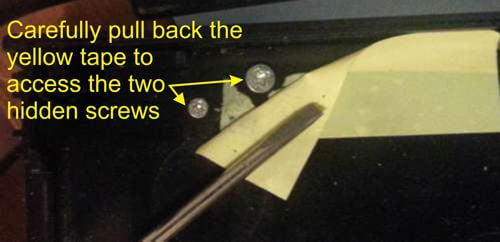
Note the yellow tape on the bottom half of the power brick.
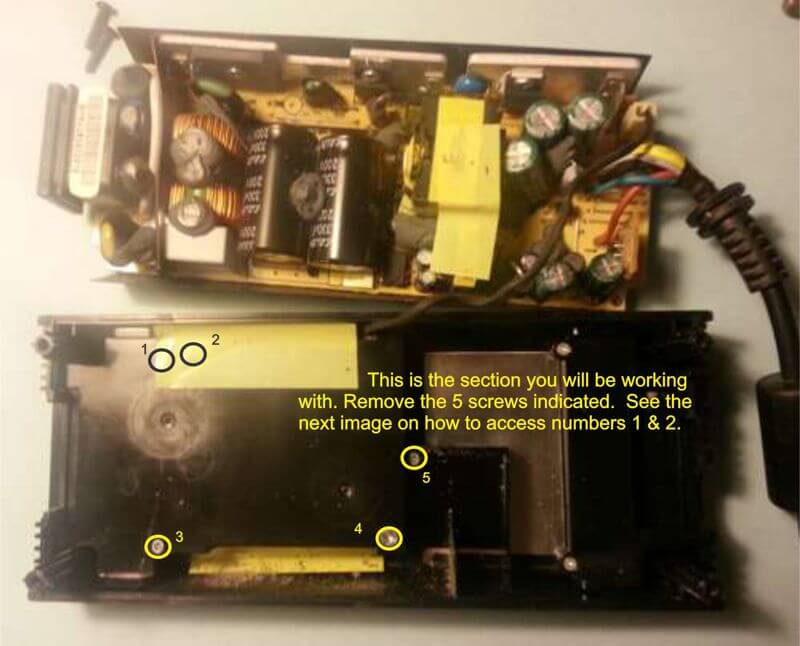
There are two different size Philips screws. One large and One small are hidden behind the yellow tape. Gently pull back the tape to reveal the screws and remove all 5.
Once the cover has been removed it will expose the fan and any dust accumulation. Use the dry compressed air to blow out the dust.

The amount of dust accumulated may be different on your power brick. This one is actually not that bad. If any compacted dust remains, use a thin blade driver and gently remove all of the remaining dust from between the fan blades.

Reassembly
Reassemble the unit in the reverse order being careful to ensure that the power cord is firmly placed in the bottom slot. Attach, cover, ensure the power cord slot is seated in the top section. Secure with screws and reapply the pads.

Finished
Summary
This process is really not hard and the benefit is money savings. As long as you have the #10 Security Torx and a driver small enough that it will not damage the screws, it is very doable. It should take you about 10 to 15 minutes to take it apart and 5 to 10 to put it back together. Go slow, follow the instructions in this post and you are good to go.
I have taken the opportunity to use this topic as a lead in to my next post. Microsoft Sway. A new “presentation/tutorial/newsletter” creation program that is web based. In the post I will be explaining, what I believe, are the pros and cons of the program.
Please check out the same material created in Sway. I will explain how to use it in my next post.
Jim