
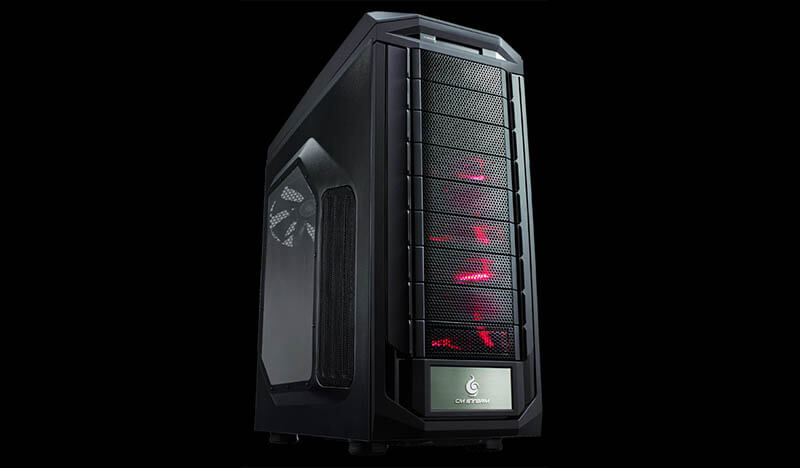
Cooler master Storm Trooper Full Tower Case
When size matters
You know that feeling when you see an object of desire in a shop window and it seems to beckon to you and whisper buy me, buy me? Well, this is exactly what happened to me last week, except it wasn’t a shop window but a link to Cooler Master sent to me by a mate who specialises in gaming, with a very tempting tagline. Not quite like seeing it in the flesh, but the result was the same you understand. I’d been hankering after a replacement full tower case for a while and whilst the NZXT Phantom had plenty of room, the gaudy black gloss finish just looked out of place in the living room. Mind you, calling a computer case Storm Trooper and inviting owners to join the mobile infantry is a little cheesy, but frankly what’s in a name?
My criteria were the following:
- Full or ultra tower
- Good cable management
- Options for water cooling
- Spacious interior
- No front opening doors
- Easy front panel access
- Cool and quiet operation
Will it fit in the house?
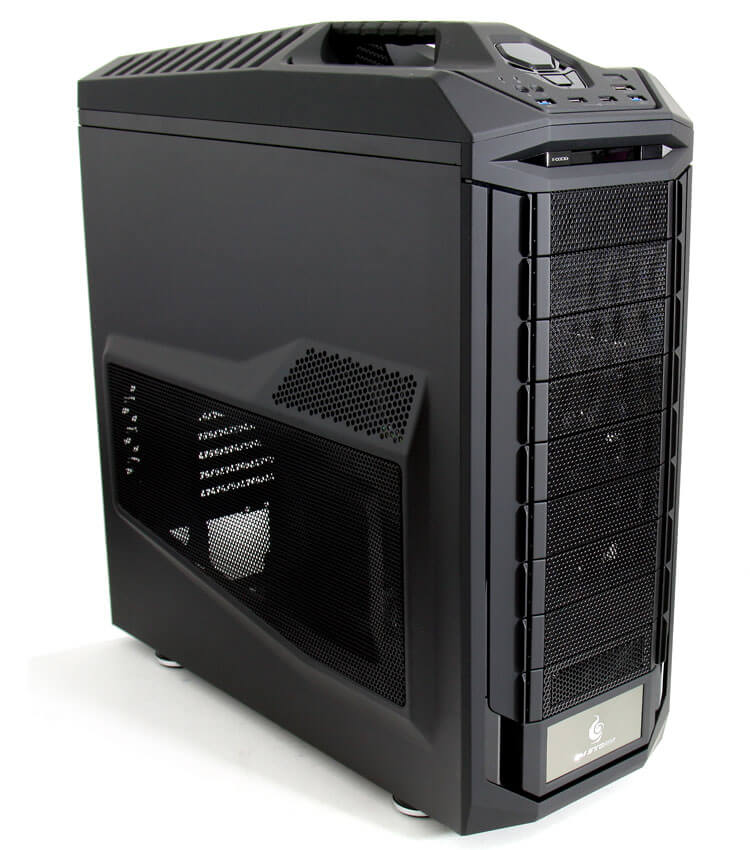
Surprisingly yes and what was even more remarkable was that the lad delivered it on the back of his motor scooter and on first sight, having tentatively opened the box and released the case into the open, I muttered to myself, damn it’s bigger than I thought, whilst smirking with delight of course. The first thing you notice is the carrying handle and believe me, this isn’t just some fancy gimmick. For a case of this size and weight, it’s a real bonus,but I can’t see myself lugging it around to LAN parties very often.

Clearly Cooler Master have put a lot of thought into the design and the rubberised finish to the handle and topside surrounding area give a real solid feel and unlike the glossy plastic found on many similar cases, you get the feeling it’s not going to scratch easily.
This is a very big computer case, measuring about two feet high and the same lengthways with about ten inches of width, which is important considering that cable management is a priority. Still, the living room hasn’t shrunk too much in the interim, so I’ve had a narrow escape. Oh and what a pleasant surprise I had when I opened the box to find that I had received the side window version, enabling us to gaze longingly at the twinkling LEDs inside the case.
Good design stands out
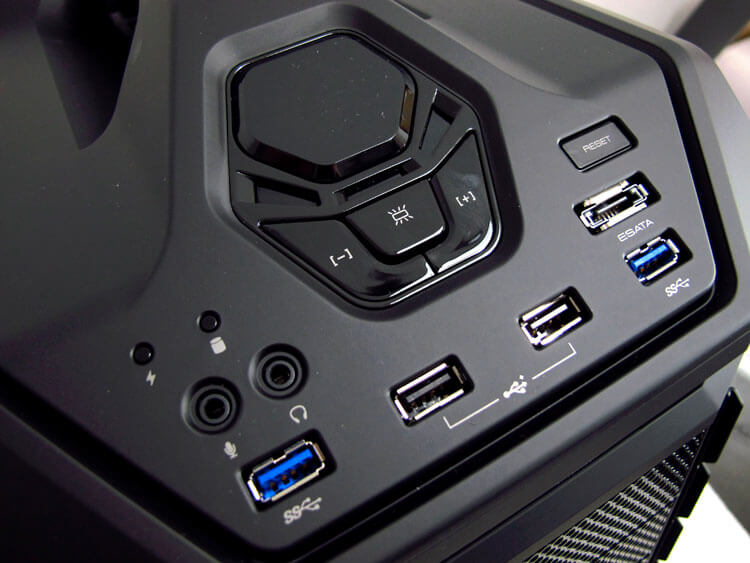
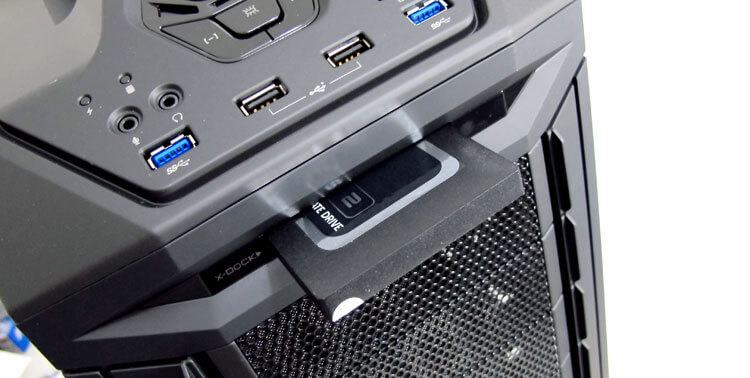
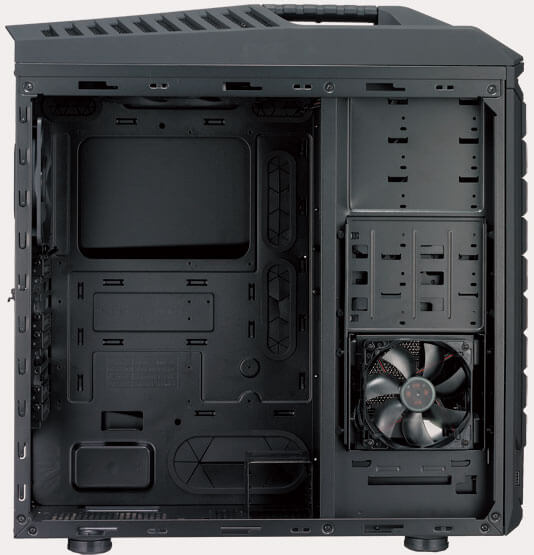
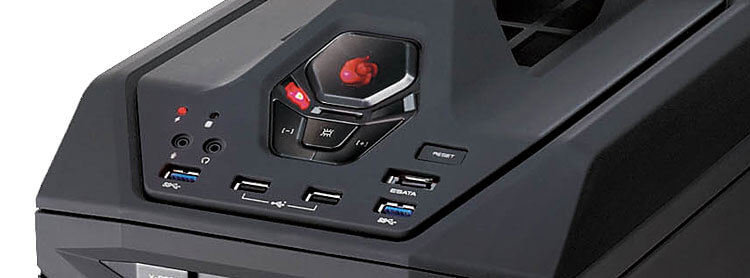
The front control panel meets my expectations by a long mile with a huge on/off button, a discreetly recessed reset switch, easy to use fan controls (up/down), two USB 2.0 ports, two USB 3.0 ports (motherboard must support 20 pin USB 3.0 plug),E-Sata port, audio ports and power/HDD activity LEDs. The buttons and LEDs glow red and the fan control buttons emit a reassuring beep when pressed which all adds nicely to the general feel of quality.But that’s not all, as just below the front control panel is the hot swappable X-Dock for your 2.5″ devices such as SSDs or laptop drives; a really nifty touch which I’m sure I’ll be making use of. In fact, when I finally get my hands on an SSD, I might even see if I can run an OS straight from the X-Dock/SSD, AHCI permitting of course.
Another cool feature, apart from not having a pesky door on the front, is that all nine of the 5 1/4″ bay panels unclip for cleaning and drive fitment, which negates having to remove the entire front of the case, which in most PC cases is a finger cutting, plastic bending struggle at the best of times.

Building the beast
Which of course is the fun part. In my case I had to remove all the components from the Phantom, clean them up as required and then fit them into the new case. This is possibly the most fun and challenging aspect of building a PC and something I could happily devote most of my time to, given the choice.
These are the components I needed to switch:
- Corsair Hydro H100i water cooling kit
- Sentey 850W PSU
- MSI GTX 970 Gaming 4G GPU
- Gigabyte GA970A-UD3P motherboard (FX 8320 CPU and 16Gb memory fitted)
- 4 x SATA 3.5″ hard drives
- 1 x SATA DVD drive
It’s not often I get to build a full tower system and the advantages over building a mid-tower or indeed anything smaller than that are very obvious, the most important being the enormous amount of space there is to play with and with a quality case, the welcome lack of sharp edges with which to cut yourself. The Trooper is fitted with filters top and bottom, the PSU sits on rubber grommets, the back panel has rubberised cut-outs for running the cables around and there’s a massive space available for the motherboard backplate should you need access to it in the future. That in itself is great design as there’s nothing more time consuming than having to remove the motherboard entirely just to fit a heatsink backplate.
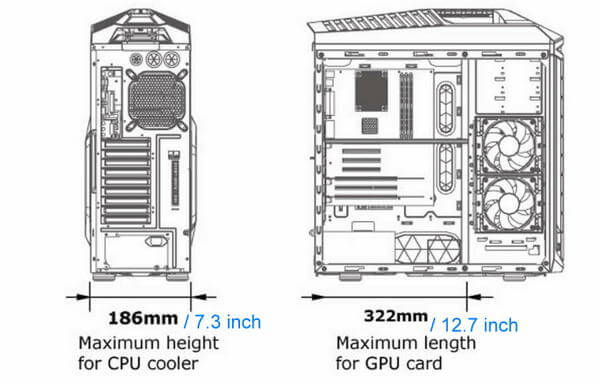
The diagram above gives you an idea of what length GPU and what height CPU cooler can be fitted in this case, not to mention PSU length with some of the larger PSUs coming in at between 8 and 10 inches which is certainly worth bearing in mind when building a high end machine.One of the most unique features of the Storm Trooper is the ability to mount the hard drive cages laterally with the cables being hidden out of sight and with the two 120mm fans side-mounted (as per the diagram above) or they can be mounted front to back allowing the two fans to suck air in from the front of the case to cool the GPU, which is the option I chose. Alternatively, you could mount one cage laterally and the other front to back depending on your cooling and aesthetic requirements.

The case is provided with numerous accessories including a 5¼ to 3½ converter bracket which I used to mount a hard drive below the DVD drive to allow more airflow from the fans.For you lucky SSD owners a small 5 unit SSD/laptop drive cage is set in at the bottom of the case which can be removed for better airflow if not required. Further down the front of the case is a small removable compartment behind the bottom CM logo panel which holds a small plastic tray for tools, screws and other odds and ends, although tou could remove it and fit a bottom facing fan or radiator instead.
Fitting the important bits
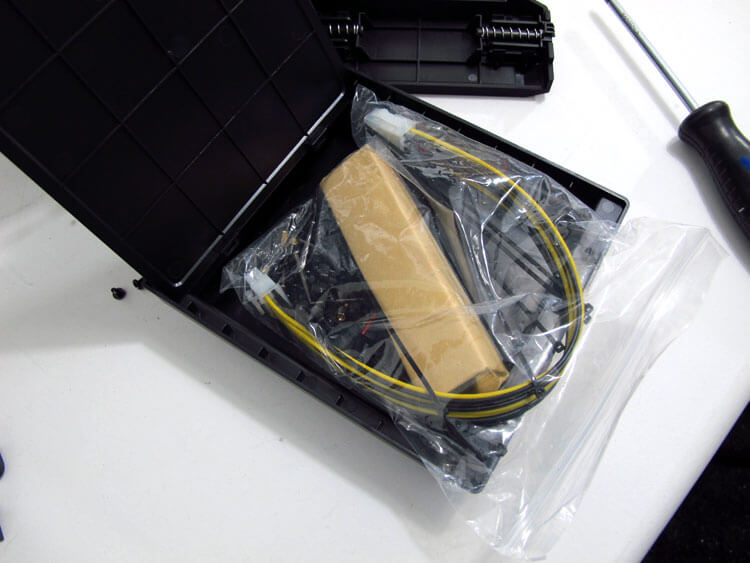
As I mentioned earlier, due to the sheer size of the case, fitting the main components couldn’t be easier and my Gigabyte ATX motherboard almost seemed dwarfed by the space once fitted. The small box of supplied accessories contains all the necessary screws and motherboard stand-offs, cable ties, hard drive cradles and one single stroke of genius – an 8 pin 12v ATX extension cable which I thought I wouldn’t need, but did.
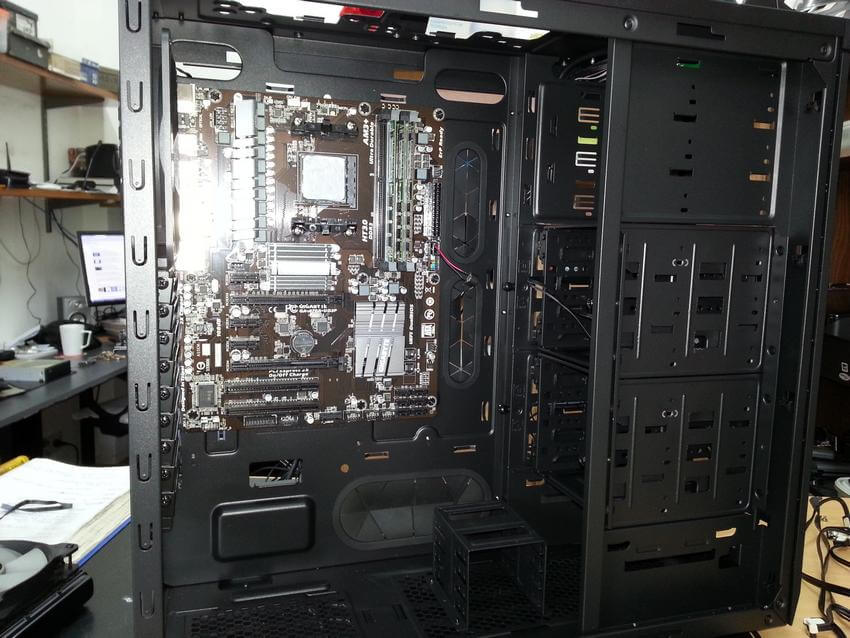
With it’s excellent cable management and routing system it’s possible to achieve a very tidy and clean layout with the bulk of the cabling hidden behind the side panel and a pack of cable ties are supplied with the case for this very reason. Water cooling is catered for, with positions for 240mm radiators both at the top and the bottom of the case, although it’s always wise to ensure the tubing will reach from the radiator to the pump, which in most closed loop systems, will be secured to the CPU heatsink.
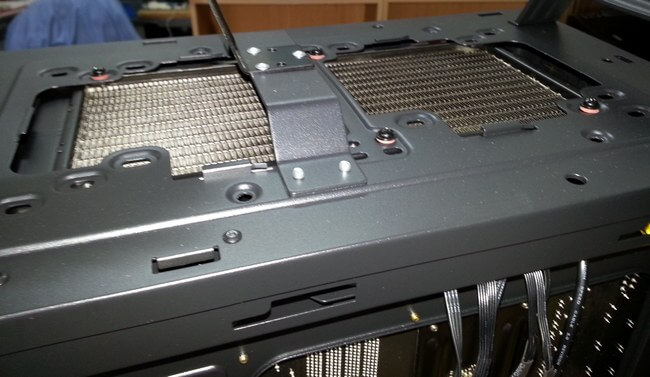
As you can see from this picture I fitted the Corsair H100i radiator to the inside top of the case, where the dual fans are pushing the air up and away from the case, altough the normal layout would be to pull air in. Incidentally, with some inventive modding it’s also possible to fit two further fans over the radiator by the handle brackets, thus creating a push-pull setup. Since the build I have damaged my right hand so have been unable to move the case for photo shots, so I’ll be including some examples showing the configuration in the Phantom for illustrative purposes.

That bunch of cables looks a bit daunting at first, but it soon becomes clear where they all go and the fun part is routing them in such a way that there’s barely a hint when viewed with the side open. The twenty pin USB 3.0 cable is easy to locate, as is the SATA cable for the front panel E-SATA. The rest are the usual motherboard front panel connectors, fan control and LED leads. What’s surprising is that CM didn’t include any SATA connections for the X-Dock drive.

This is how the finished article looks with one of the front fans cooling the three hard drives and the other discreetly hidden in the hard drive cage, pulling air in which is then pushed out through the rear 140mm fan and top of the case, which is fitted with a huge 200mm low noise fan. In my build, the water radiator with two 120mm fans is of course at the top replacing the 200mm fan.
Conclusion
Clearly the Storm Trooper is an enthusiast’s case and appeals to gamers and high-end system builders both for its looks and size. Initially launched in 2011, it’s still available at most major online retailers including Amazon and Newegg, now as the Rev 2.0 with side window and one only has to read the reviews to see how well respected this design has become. At around 15 kg (30 lbs) it’s heavy and you can double that when fully loaded with gaming components, which is why the handle is such a great design feature. For me, two features stand out, namely cooling options and relative quietness. With so many cooling configurations to choose from, it’s possible to achieve an ideal set up and whilst a totally sound-free system is a difficult goal to reach, the quality of the case components helps enormously in this respect.
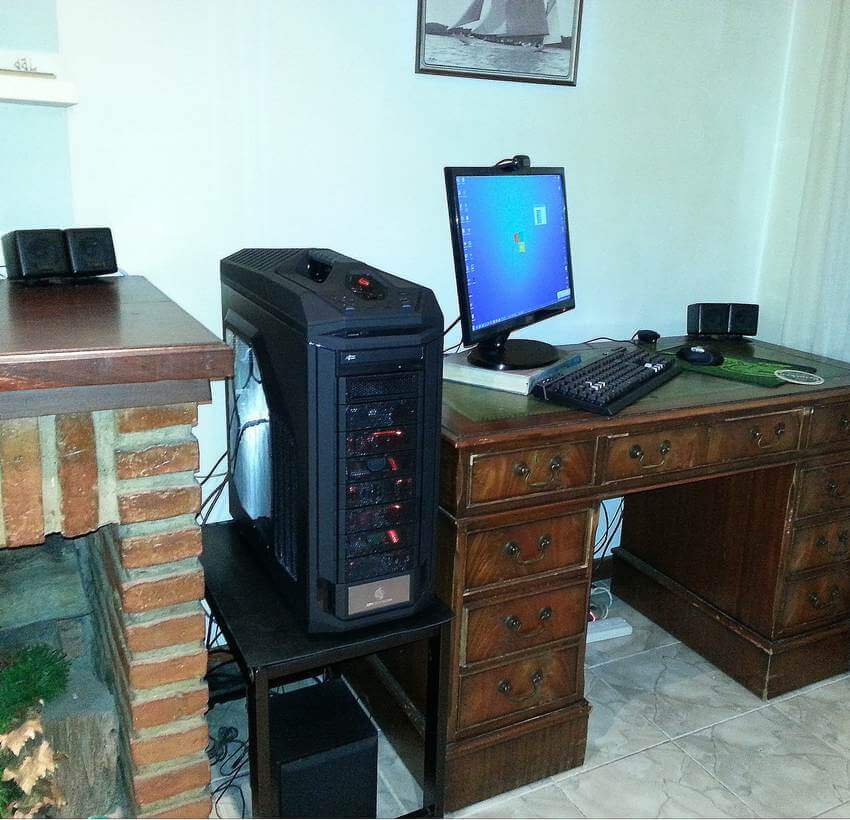
The Cooler Master Storm Trooper is easily the largest and most impressive PC case I’ve either owned or indeed built a system around and seeing its menacing yet inviting presence next to my desk when I come home from work is indeed a pleasure. In fact, if a computer case could talk, this one says let’s play every time I look at it, which is just the way it should be.
You really no how to tempt a guy, beautiful case and workmanship.
Now that’s a cool bit of macho gear, love it!
I have had my Trooper for about 2 years now and i still love it. You can also get this beast in white called “Styker”. I would recommend the Cooler Master case but it is big and yes it does stand out!!!
“In fact, if a computer case could talk, this one says let’s play every time I look at it”, i would agree with that.lol
Couldn’t agree more mate!
Hey i’ve had the CM Storm Tropper for about 5Years now. and now i just upgraded all hardware inside it. and made som customizations on it some paint here and there. but my problem is i can’t figure out how to remove the damn top panel (the one with the handle on)? i need to repaint the black grit parts i i dont want to use exstreme force .Thanks 😀
Chris
The secret is to remove both side panels and you’ll find that the top has plastic clips facing down that pop into rectangular holes in the metal top. All you need to do is push or pull each of the clips, pull the top upwards and then gently lift the top off.No great force is required and I’ve done it loads of times for cleaning dust away.