My workplace decided that we needed to update our Microsoft software. This was very momentous since we were still running Microsoft Office 2003. With that in mind, we upgraded to Office 365 which I use in my own business. Now that we have changed, we needed to set up my email on Outlook. No problem, and after transferring all my contacts and email, it was time to start emailing. After a week of using this new software I noticed a setting that was a little annoying, the default reply option on my email was set to “Reply All.” This is not my favorite since I prefer to select that when I’m emailing a group since I don’t always want to reply to everyone on the email. To give credit where credit is due, my coworker, Jon, pointed out how to fix this issue. Now that I know, I wanted to share this knowledge with our readers. Time to start learning with your favorite writer.
I will be showing you how to do this with the Online Outlook Web App since this is the one I always use.
How To Change Reply Default In Outlook Web App
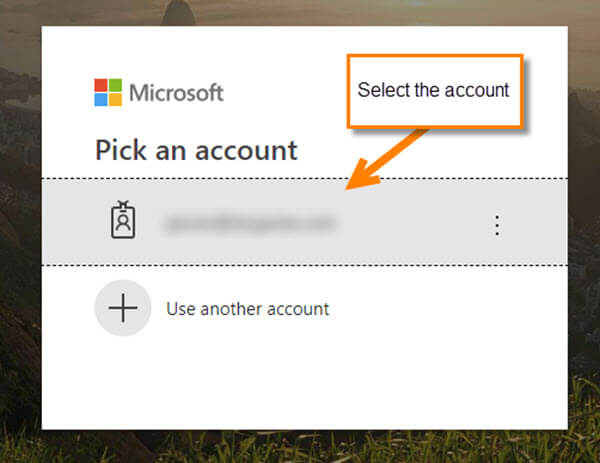
Step 1: First, log in to your account on Microsoft Portal Office. Head to portal.office.com in your browser. Select the account you want to use and continue to log in.
Step 2: Once logged in, click on your Outlook Web App icon.
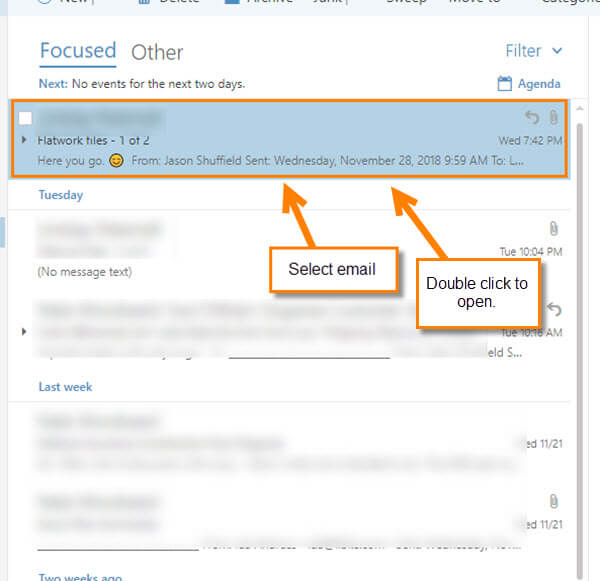
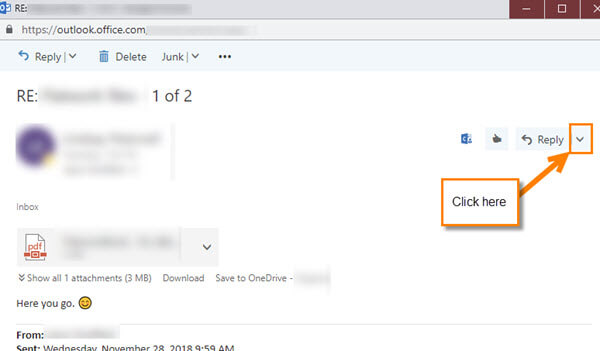
Step 3: Now that we are in your Outlook email, select an email. You can either double-click the email to open it, or click it once. This will have it show up on the right of the screen. (I like to double click.) In the email, go to the right and click the down arrow next to your Reply/Reply all option.
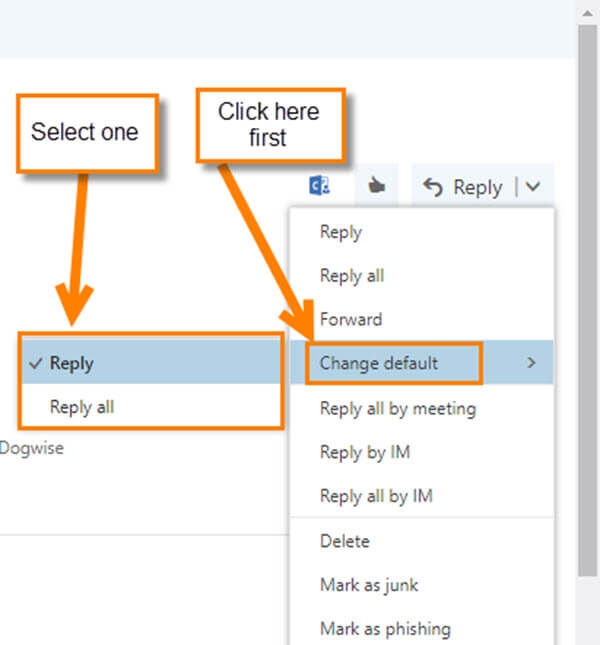
Step 4: You should see a menu and from here, click on Change Default. Here you can choose Reply or Reply all to be your default. Click on the one you want. DONE!
This will now be your default for all your email. Now, get in there and set this to the way you like it.
Bonus Tip
You can also find this through your Settings. Let me show you how to go this way.
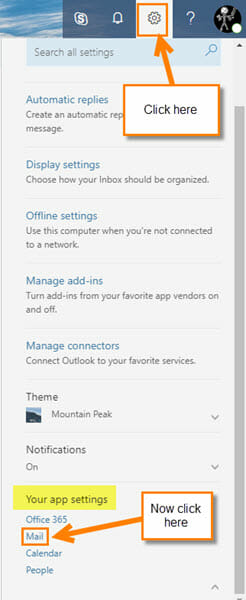
Step 1: Head to the top-right and click on the Gear Icon. From the Menu head to the bottom and click on Mail.
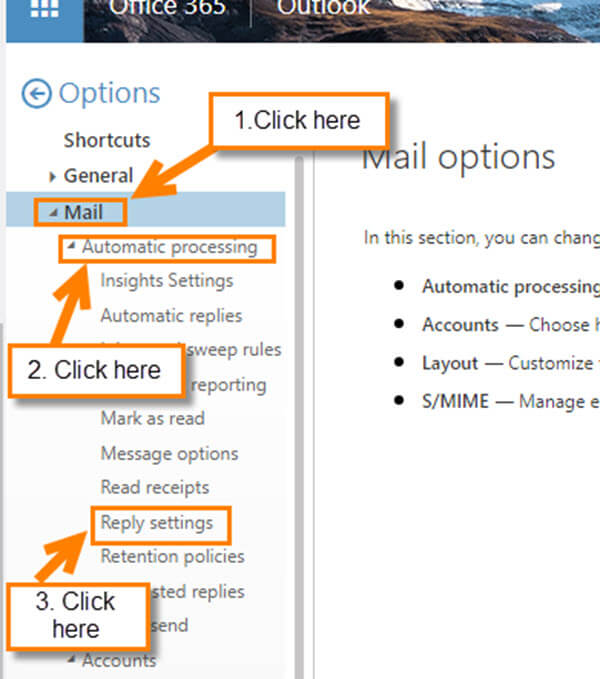
Step 2: Once in the Mail options you will want to look at the menu to the left. From here, click on Mail then Automatic processing and head down to Reply Settings. Click it.
Step 3: Under Reply Settings you can pick either option here like we did on the email itself. Once you choose, you will need to click Save at the top. DONE!
Now you know two ways to change the default. Your mission now is to share this knowledge with others.
Here’s a short video demonstrating the process:
To watch more How-To videos like this one, check out our Dave’s Computer Tips YouTube Channel. We’ll be adding more videos in the future.
Do you use Office Outlook 365 at work or at home?
—

