Some folks find it a bit tedious creating their timeline in Word, especially when they need to make customized changes and updates often.
If you are one of that faction, I have good news for you. PowerPoint is actually a better medium for creating visual meetings, business expos, etc. Oh, and one more thing, you can do this automatically in PowerPoint! That is a really big feature, isn’t it? I thought that would get your attention!
(Ed note: You can click on the following images to enlarge them for easier reading.)
Follow the steps below to learn how:
- First, you must install Office Timeline Plus, which will add a timeline marker tab to your PowerPoint Ribbon.
- Open PowerPoint and enter your data into the Office Timeline Wizard.
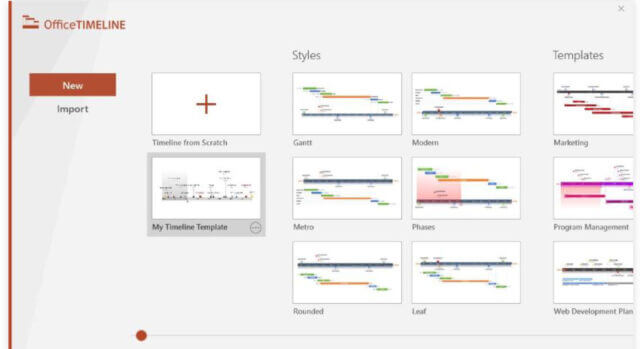
- On the Office Timeline Plus tab on your Ribbon, you will click on New and that will transport you to a gallery from which you can select from styles and templates for your timeline.
- Double-click on the style or template of your liking and select Use Template in the preview window to open the Data Entry Wizard. If you have another template in there, you can select that one.
- In the Data Entry window, you can manually enter your events and set dates for them or you can simply copy and paste from an existing Microsoft Excel file. While you are there, you can start making some customizations if you like (i.e., color changes or changes to shapes you have added).
- Once finalized, click Create.
A new timeline slide will be generated instantly.
You can easily style or update your timeline automatically using Office Timeline. You can change the color, date format, or position of any event or add new ones as circumstances evolve. You can even create tasks, such as charts, etc.
A big time and keystroke saver in my humble opinion!
—


