

These days it is not unusual for a computer to have two or three USB storage devices plugged in at the same time.
Windows assigns drive letters in the order in which you attach a device, so the same memory stick might be drive J one time and drive O another time for example; making it very difficult to know what is on each connected stick/card without opening each one.
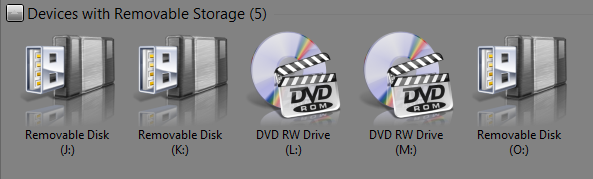
There are several free drive USB letter managers around but this is how to give each of your removable drives and cards its own unique icon and label in the ‘Computer’ window or the Explorer pane.
- Choose the icon you want to use for that drive, it must be 32×32 and have the .ico extension.
- Copy and Paste the icon into the root of the drive/card.
- Open Notepad and create a text file with the following lines:
[autorun]
icon= the name of your icon .ico
label= the label you want to assign . E.g. Alans Files
- Save the file as autorun.inf and copy into the root of the drive/card
Now if you have one or more storage devices plugged into your computer, when you click on ‘My Computer’ or open Windows Explorer they will be shown with the icon and label you assigned to them, thus making them easier to identify.
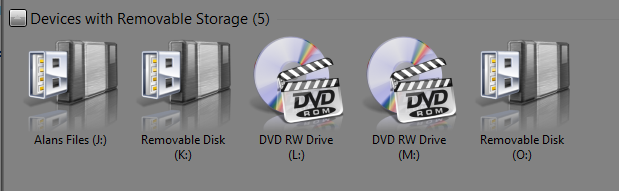
Of course, if you just want a label without a custom icon then just leave out the icon= line (I chose to leave out the icon).

