Have you ever used one of those Android TV boxes? Rather than spending money buying one, you can make your own using a USB flash drive and your PC.
Warning: This sounds simple in theory, but in practice, I experimented with at least half a dozen Android images and multiple booting on four different computers before I was able to get this to work. So, it’s not for the faint of heart.
You will need a flash drive at least 8- 16 GB. An Android ISO image. I got this one “Atv-8-x86-Techinfo-k4.19.15-32bit.iso” from here:
Download Android TV Images From here.
You will need “Rufus” to create your bootable flash drive. Download Rufus from here.
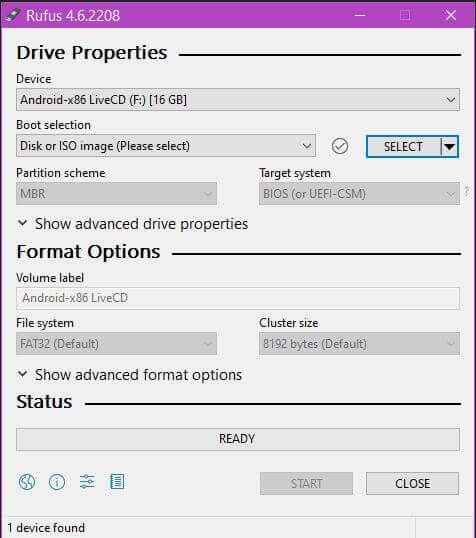
Insert your flash drive. Open Rufus. Use the “Select” button to find your downloaded Android ISO.
The settings I used:
Partition scheme: MBR
Target system: BIOS (or UEFI-CSM)
File system: FAT32 (Default)
Cluster size: (8192 bytes (Default)
Volume label: <your choice>
Then click on “START”.
Wait for it to finish. Then boot from it. You might have to disable secure boot for this to work and it might work better on older tech.
Note: I’m booting here from my “Acer Aspire X1430 ” desktop that originally had Windows 7. No wireless. And that’s going to cause a slight problem.
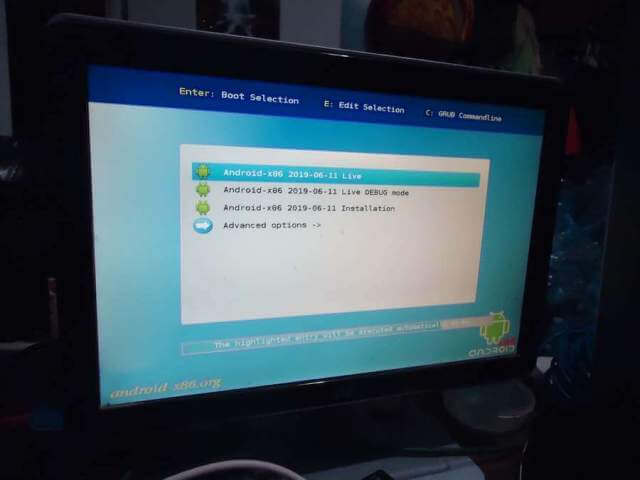
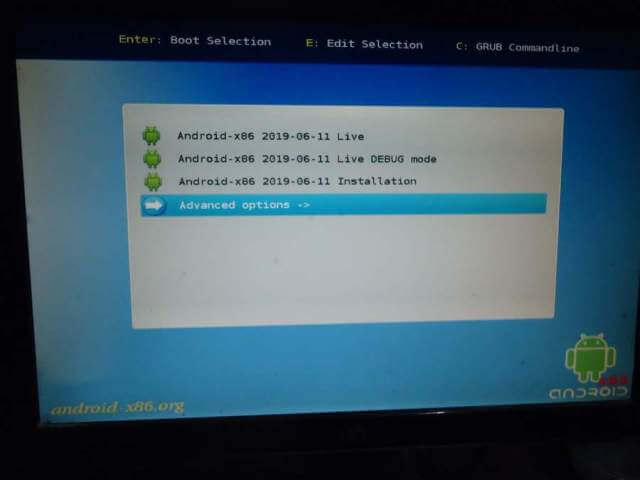
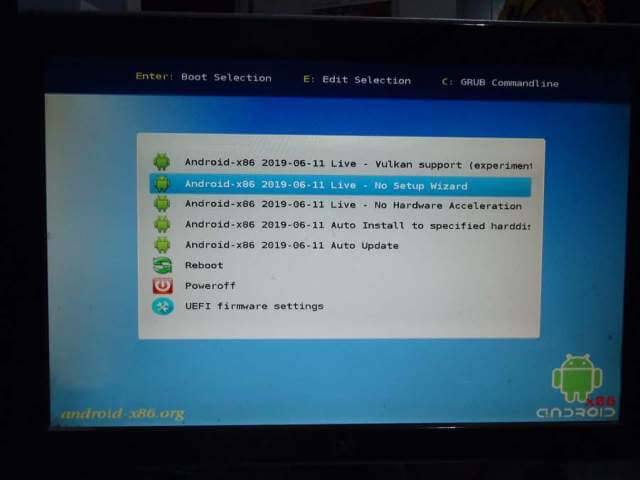
Here is my first screen.
If I boot from the first option, it then goes to the Google logo.
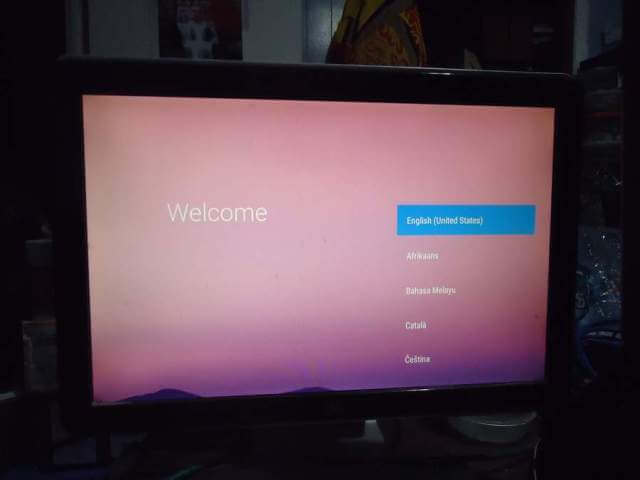
Then a Welcome screen. My mouse and keyboard are working here. Select your language. I left this option on “English (United States)”.
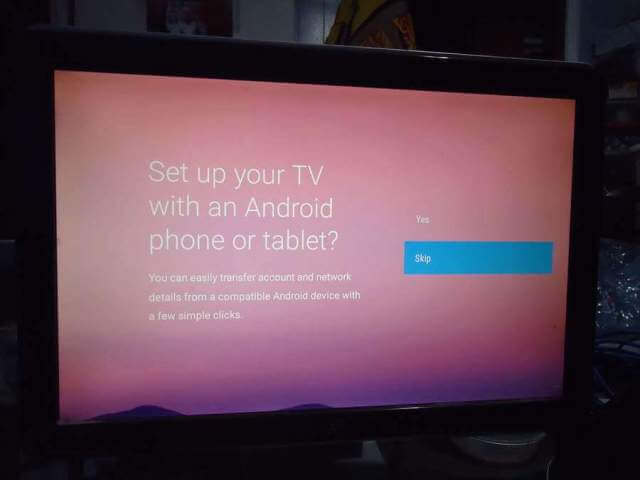
On the next screen, “Set up your TV with an Android phone or tablet?” I selected “Skip”.
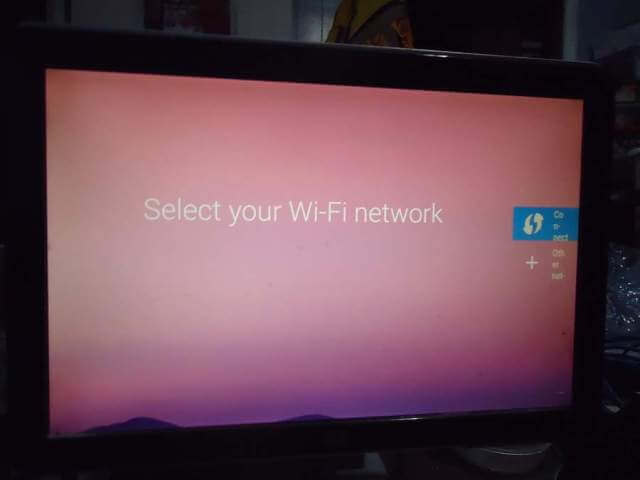
This is where my problem started. It wanted me to “Select my Wi-Fi network”. It did not pick up my Ethernet. I could not go any further than this. If you do have Wi-Fi enabled and it’s detected, just follow through. Connect to your network. It will eventually ask you to sign into a Google account or create one.
This is the furthest I got so I tried booting from this version on two different laptops. Neither worked. It would always freeze at a command screen at “Detecting fugu …. found at /dev /sda1”
Back to my Acer. I did find a way to bypass the wireless option. I booted off the drive and using the arrows on the keyboard, switched to the “Advanced options” on the boot screen. Clicked “Enter”.
Then I selected “Android-x86 2019-06-11 Live – No Setup Wizard”.
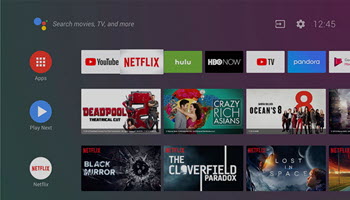
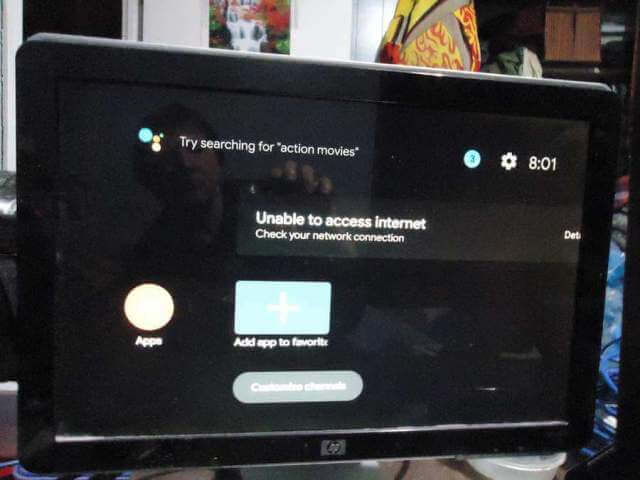
That worked. Here is my awkward screenshot of the first screen I came to after that.
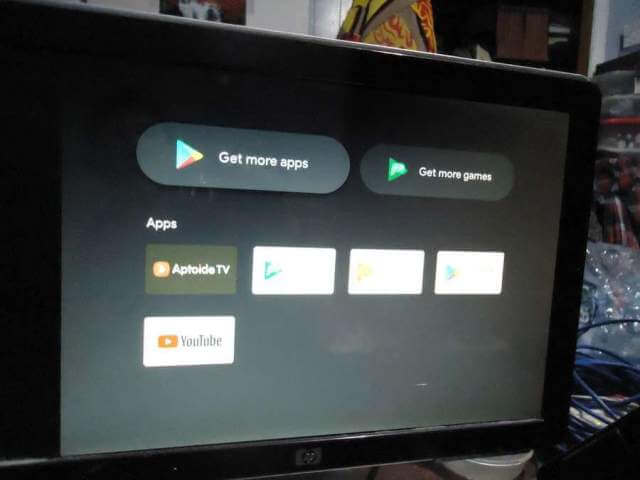
If I click on the “Apps” option, this is the screen I’m taken to.
Note: Use your right-click mouse button as a “back” button.
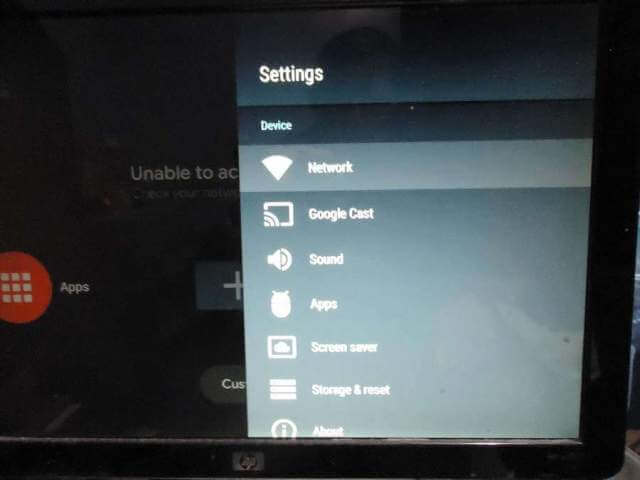
So I went back to the original screen and clicked on the “Settings” icon.
If you ever used an Android box you should be familiar with this. Unfortunately, no wireless and it wasn’t detecting my Ethernet so this is as far as I can go.
I’m still considering this a success. If you have an internet connection, the only thing left to do now is to download your favorite TV apps. Do you have an Android TV box? What are your favorite apps? And if you ever tried this and got it working or not, let us know in the comments.
Further reading:
—
Ok, so I was thinking maybe I’ll give this a go using my phone as a hot spot. Not that I watch much TV in the first place but one channel has been advertising a program available on free to air internet tv.
Anyway I began reading and was stumped by the word ‘image’.
Now there was a time when I was computer literate but not anymore. It is all way too complicated for this old gal now.
So I’m thinking does he mean an image (version) of the program or simply a screenshot of the Google tv icon. Have things got so technical now that all it takes is a pic of the icon to get a program?
So I felt it best to ask. Because I nolonger have internet. I’ve lived without it now for 16mths and have decided not to go that journey again. My phone is basic but all I need.
So if ‘image’ is a program version then I will not go forward with this quest as the phone won’t handle the data volume.
Image in this case means a program. To be precise the entire Android TV operating system.
Ak yes, ok thanks for that.
I’ll just have to content myself with what ever the channel throws at me.
I was planning to get starlink when I began travelling but not sure I’ll bother as the portable version is a lot of money.
Hello, Just a thought (idea). Do you think a wireless adapter would work?
I was wondering about this myself. I had a couple of those but gave them to my Nephews a while ago. I don’t have any to test.