
In Parts 1 and 2 of this article, I explained what a VPN is, the reasons to put one on a router, equipment concerns, how to add a VPN client to a router, and what modifications to make to the default settings. In this part of the series, I will cover how to create rules to get traffic to the VPN client and how to manually assign an address to a device on the network.
Assigning Traffic
The VPN client has been set up and is connected to the VPN server, but I have not assigned any traffic to go through the VPN. To do this, I need to set up a rule. The first rule will assign all data to go through the VPN client. My network is on 192.168.81.1. Every device on my network will have an address between 192.168.81.0 and 192.168.81.255. I could set 256 rules, one for each device, but that would be tedious. Also, my router only has room for 199 rules.
CIDR
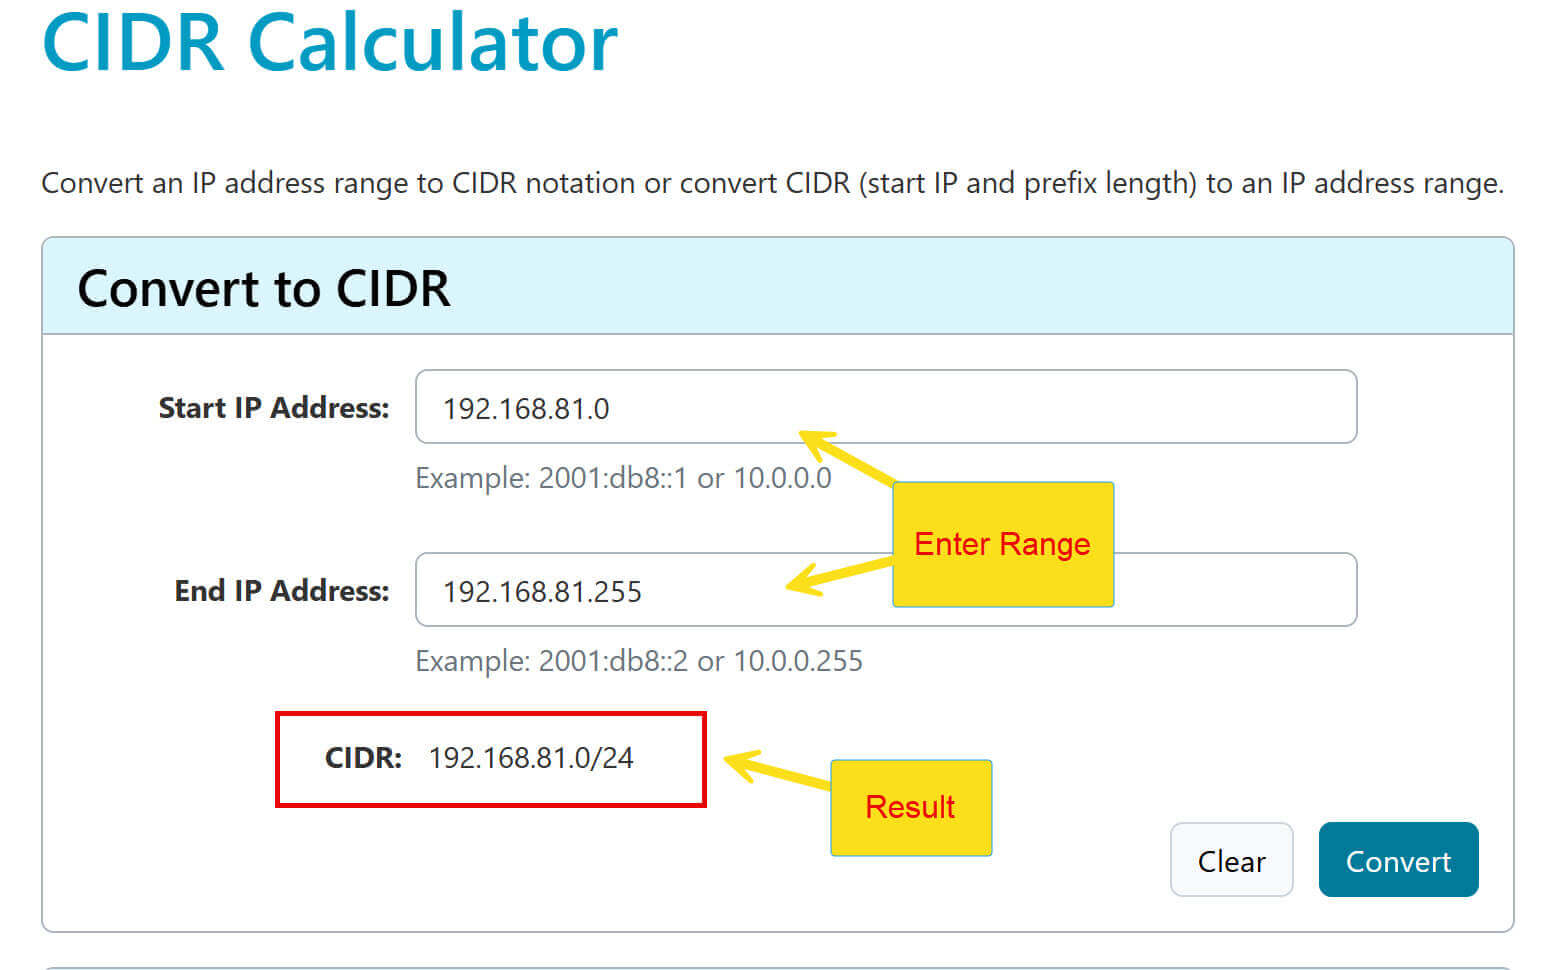
Instead of creating rules for every IP address, I will be using Classless Inter-Domain Routing (CIDR) notation. CIDR is a method for allocating IP addresses for IP routing. In CIDR notation, I assign an IP prefix and follow it with a length. It works backwards from what you would expect, where the smaller the number, the larger the range. I can go to a CIDR calculator and see that the range for everything in my subnet would be CIDR 192.168.81.0/24.
Create A Rule For All Traffic
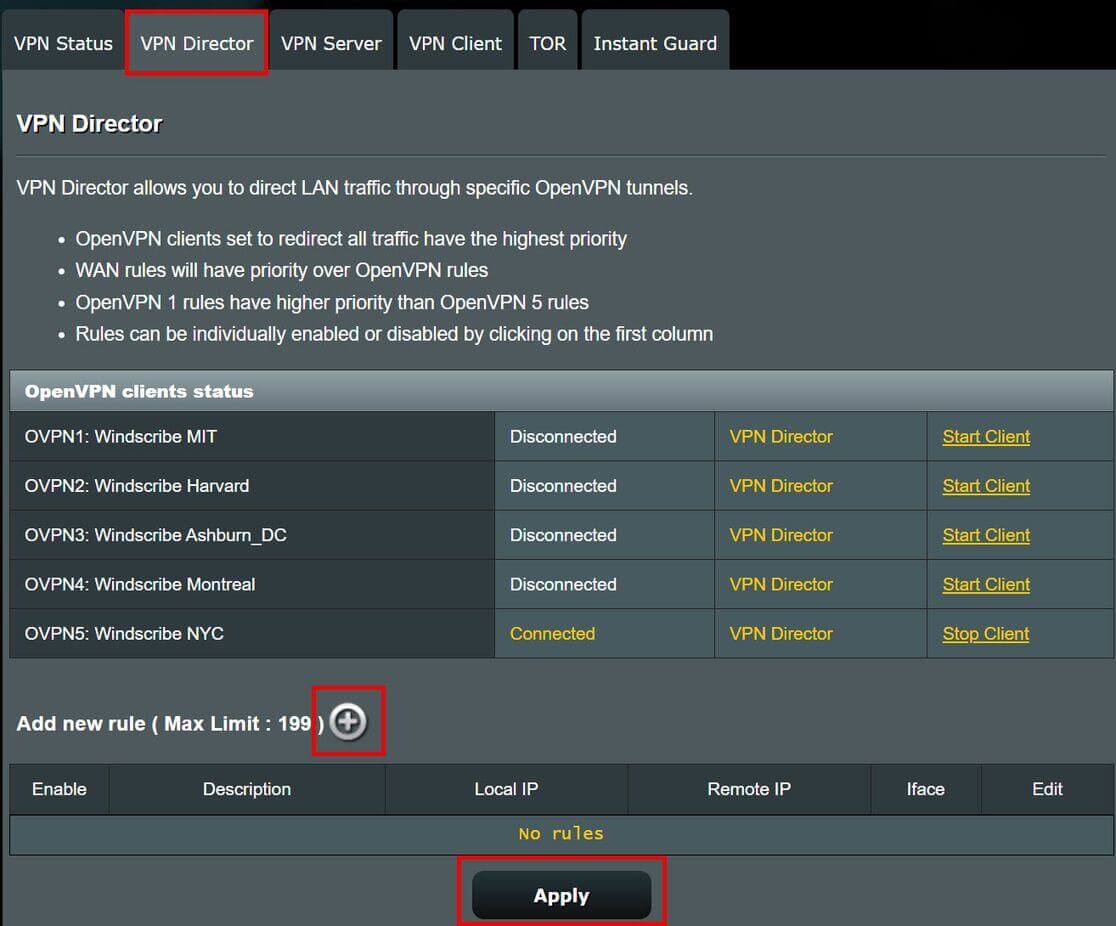
To enter a rule, I need to go to the VPN Director by selecting its tab. To add a new rule, I will go to the Add new rule area of the page and select the + (plus) button.
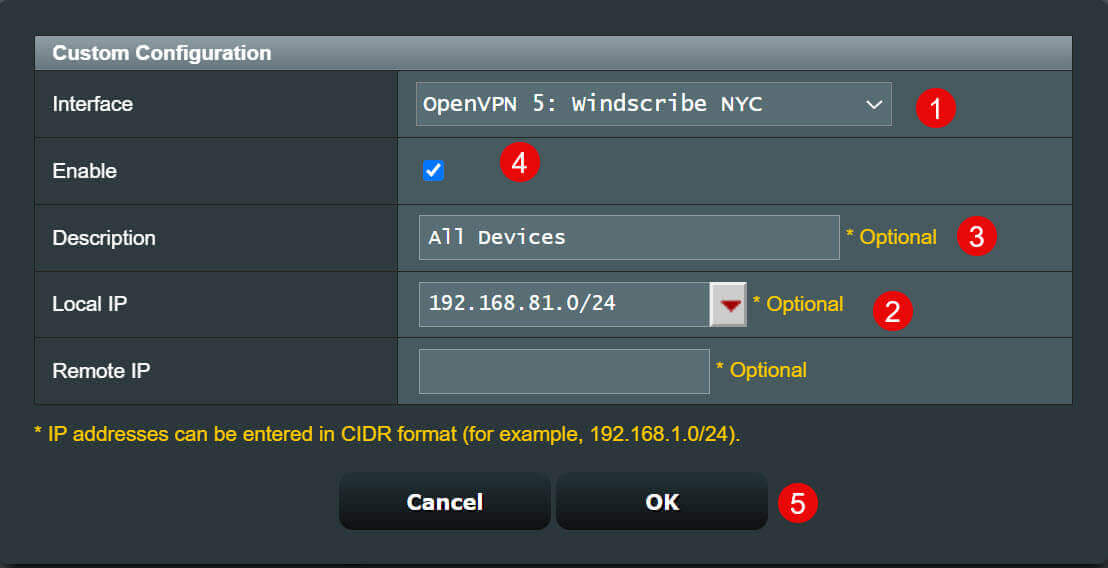
The rule Custom Configuration page will open. In the Interface field, use the drop-down to select the VPN client. I will select OpenVPN 5, which is the VPN client I created. In the Local IP field, I will enter 192.168.81.0/24, which is the CIDR notation for all devices on the 192.168.81.1 subnet. In the Description field, assign a descriptor. In the Enable field, click the checkbox. Now click OK to create the rule. Finally, click the Apply button to save the rule to the VPN Director.
All internet traffic will now flow through the VPN client.
Create DHCP Addresses
Before I can create rules for devices, I need to know the device’s IP address. However, when I first connect a device to my network, the router assigns that device an IP address. This address is not permanent but can change over time. I need to assign a static address to any device for which I am creating a rule. I do this using Dynamic Host Configuration Protocol (DHCP) in the router’s DHCP server. On my network, every device has a manually assigned IP address – it is best practice. Although it is not necessary, I also assign similar device types to a range (for example, all streaming devices get assigned an IP address between 192.168.81.160 – 192.168.81.169). It simplifies administrative tasks.
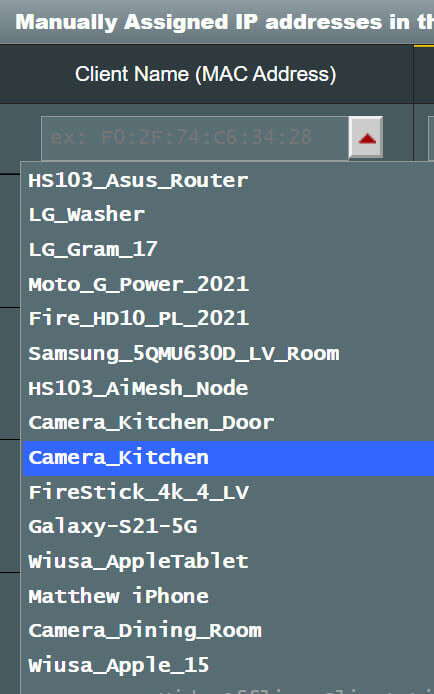
Assigning IP addresses is easy. Go to the DHCP Server under the LAN section on the router. On my router, I select LAN from the main menu and then select the DHCP Server tab. I then go to the Manually Assigned IP addresses in the DHCP scope area of the page. To assign an address, use the dropdown to select a device (in the example, I’m selecting a Firestick) in the IP Address field, enter the desired IP address, in the Hostname field, assign a descriptor, and click the + (plus) button to create the manually assigned address. Click the Apply button to save the address.

How do you create rules to bypass the VPN client based on devices or websites? I’ll explain these concepts in Part 4 of this article. Stay tuned!
- Adding A VPN To A Home Network – Part 1
- Adding A VPN To A Home Network – Part 2
- Adding A VPN To A Home Network – Part 3 ⬅ You are here
- Adding A VPN To A Home Network – Part 4
—