
In Part 1 of this article, I explained what a VPN is, the reasons to put a VPN on a router, and equipment concerns. In this part of the article, I will cover how to add a VPN client to a router and what modifications to make to the default settings.
Getting The Config File
To install a VPN client on your router, you will need a configuration file. Although there are many VPN tunneling protocols, the two that matter are OpenVPN and WireGuard. OpenVPN has been around for a long time and is more widely compatible. However, OpenVPN was not designed for modern processors and is relatively slow compared to WireGuard. WireGuard is a modern protocol and is generally fast. Given the choice, you will probably want to go with WireGuard.
| WireGuard | OpenVPN | |
| Speed: | High | Moderate |
| Encryption: | High | Low to high (configurable) |
| Security: | Relatively high | High |
| Encryption: | ChaCha20 | AES, Blowfish, Camellia, and also support ChaCha20 |
| Compatibility: | Low | High |
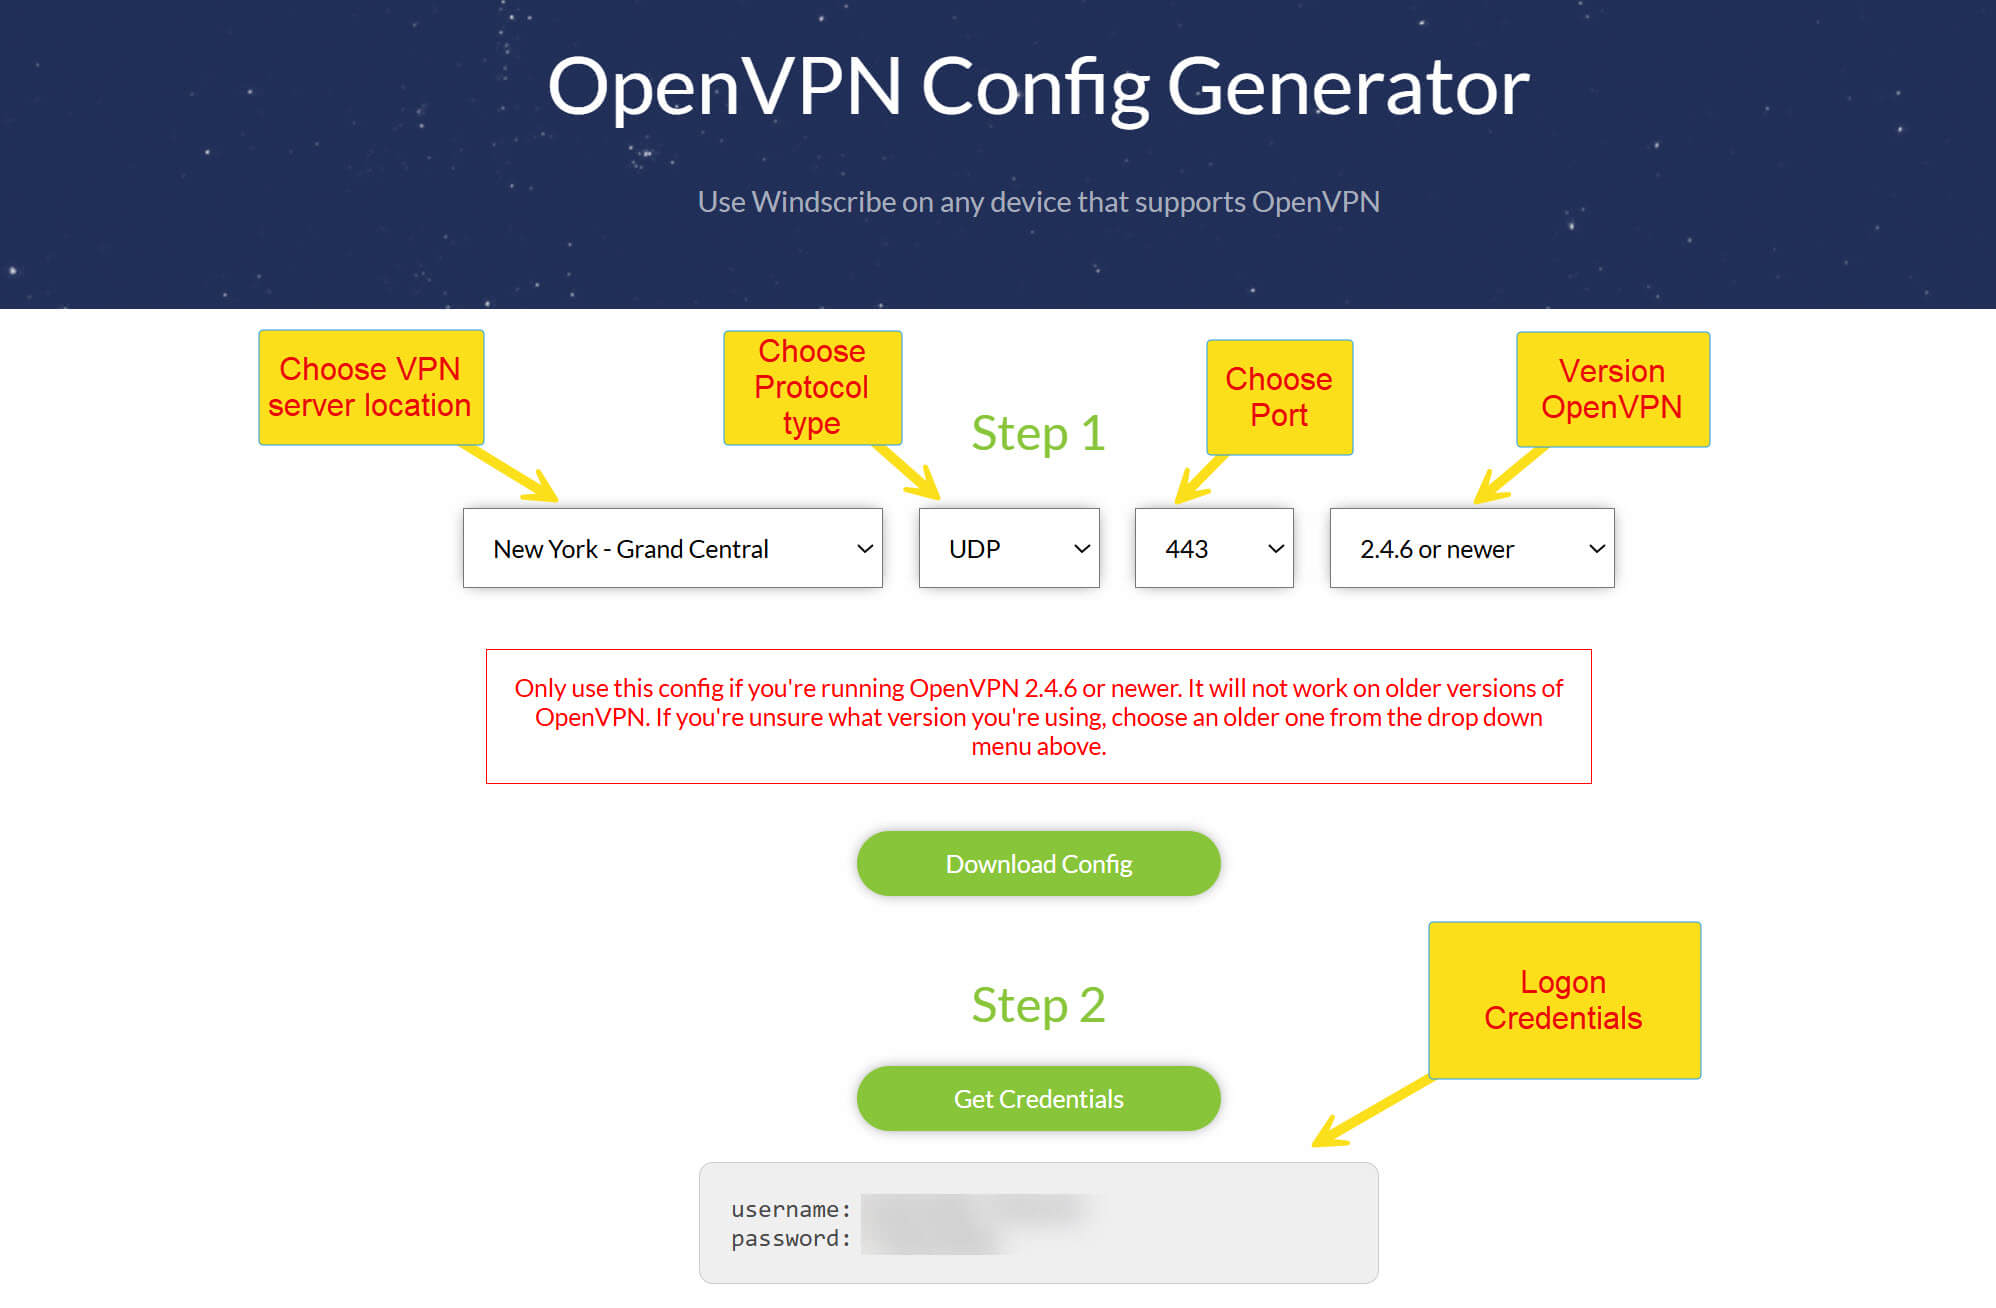
Go to your VPN provider to download a config file. My VPN provider is Windscribe. Since my router cannot run WireGuard, I will use Windscribe’s OpenVPN configurator to get an OpenVPN configuration file (the file will have an .ovpn extension). You will need to choose the VPN server location. I chose a server in New York City. You may also have a choice of configuration settings. Windscribe gives a choice of protocol (I chose UDP), port (I chose 443), and OpenVPN version (I chose the latest).
You will also need logon credentials for the server. Windscribe’s configurator supplied me with my username and password.
Creating The VPN Client
You will need to access your router’s settings page. Open a web browser and enter your router’s IP address in the address bar (common IPs are 192.168.1.1 or 192.168.0.1). Enter the router’s username and password to log in. Once in, look for a VPN settings page.
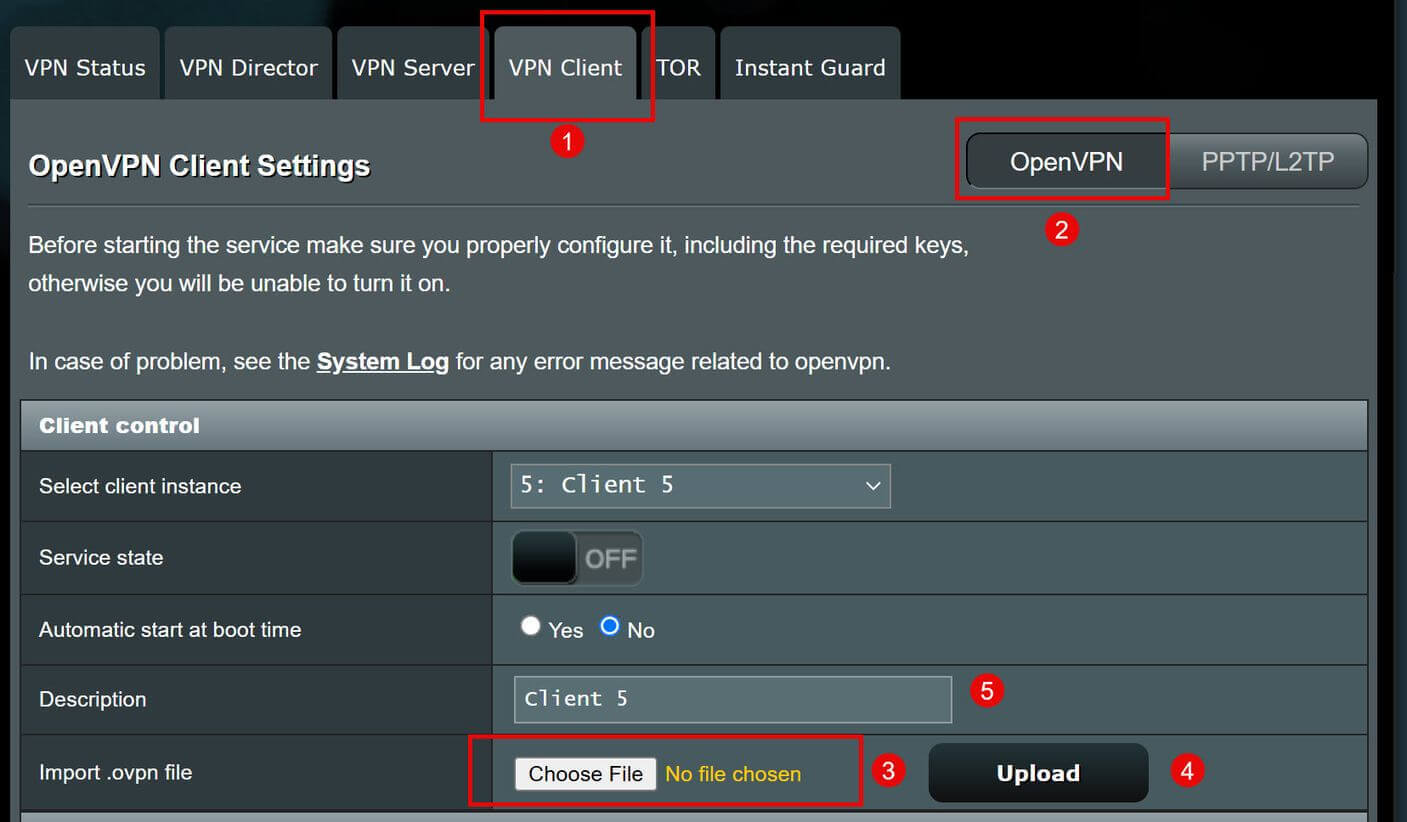
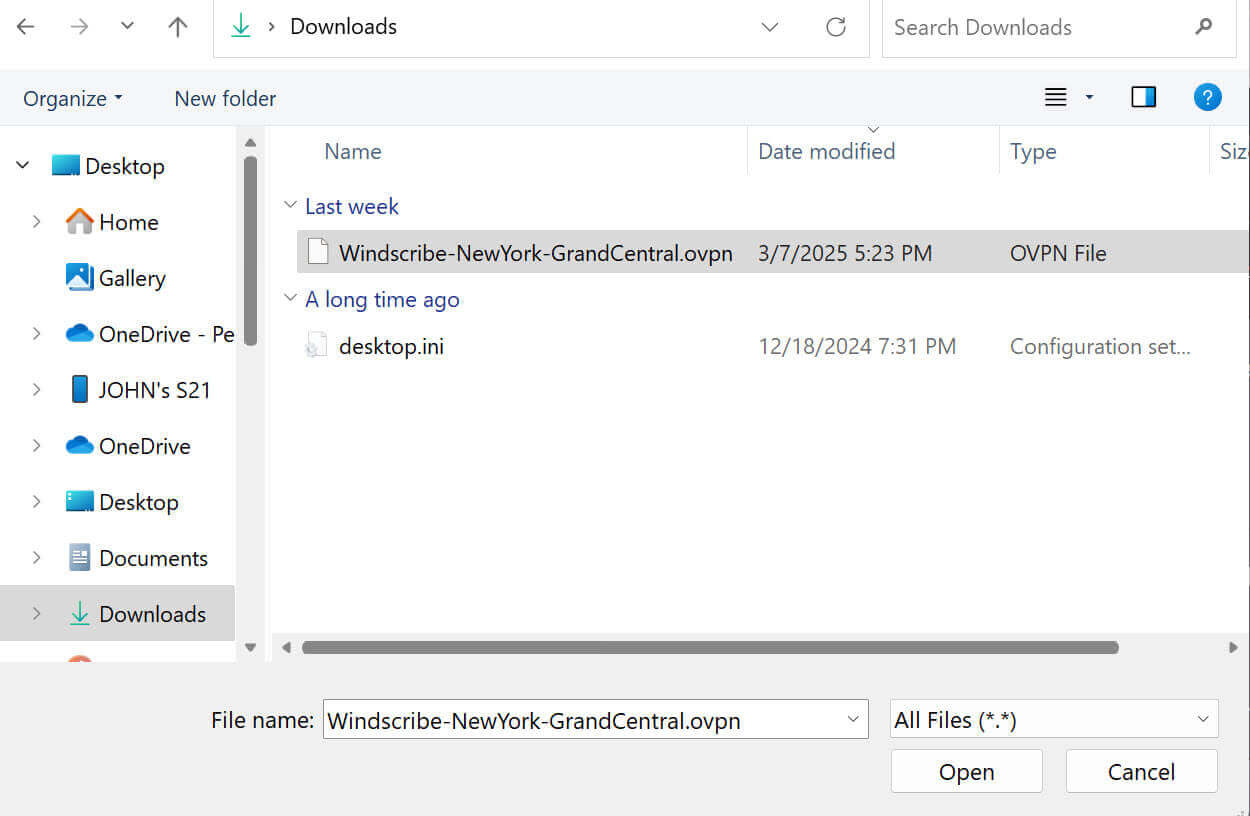
My router’s VPN page has six tabs – I will select the VPN Client tab. Next, I will select the OpenVPN button since this is the type of client I am going to set up. Now I need to load the .ovpn configuration file I downloaded from Windscribe. In the Client control area, I will click on the Choose File button, navigate to the folder where I downloaded the file, and select the file. I will now click the Upload button to load the file. After the file loads, I will give it a name in the Description field.
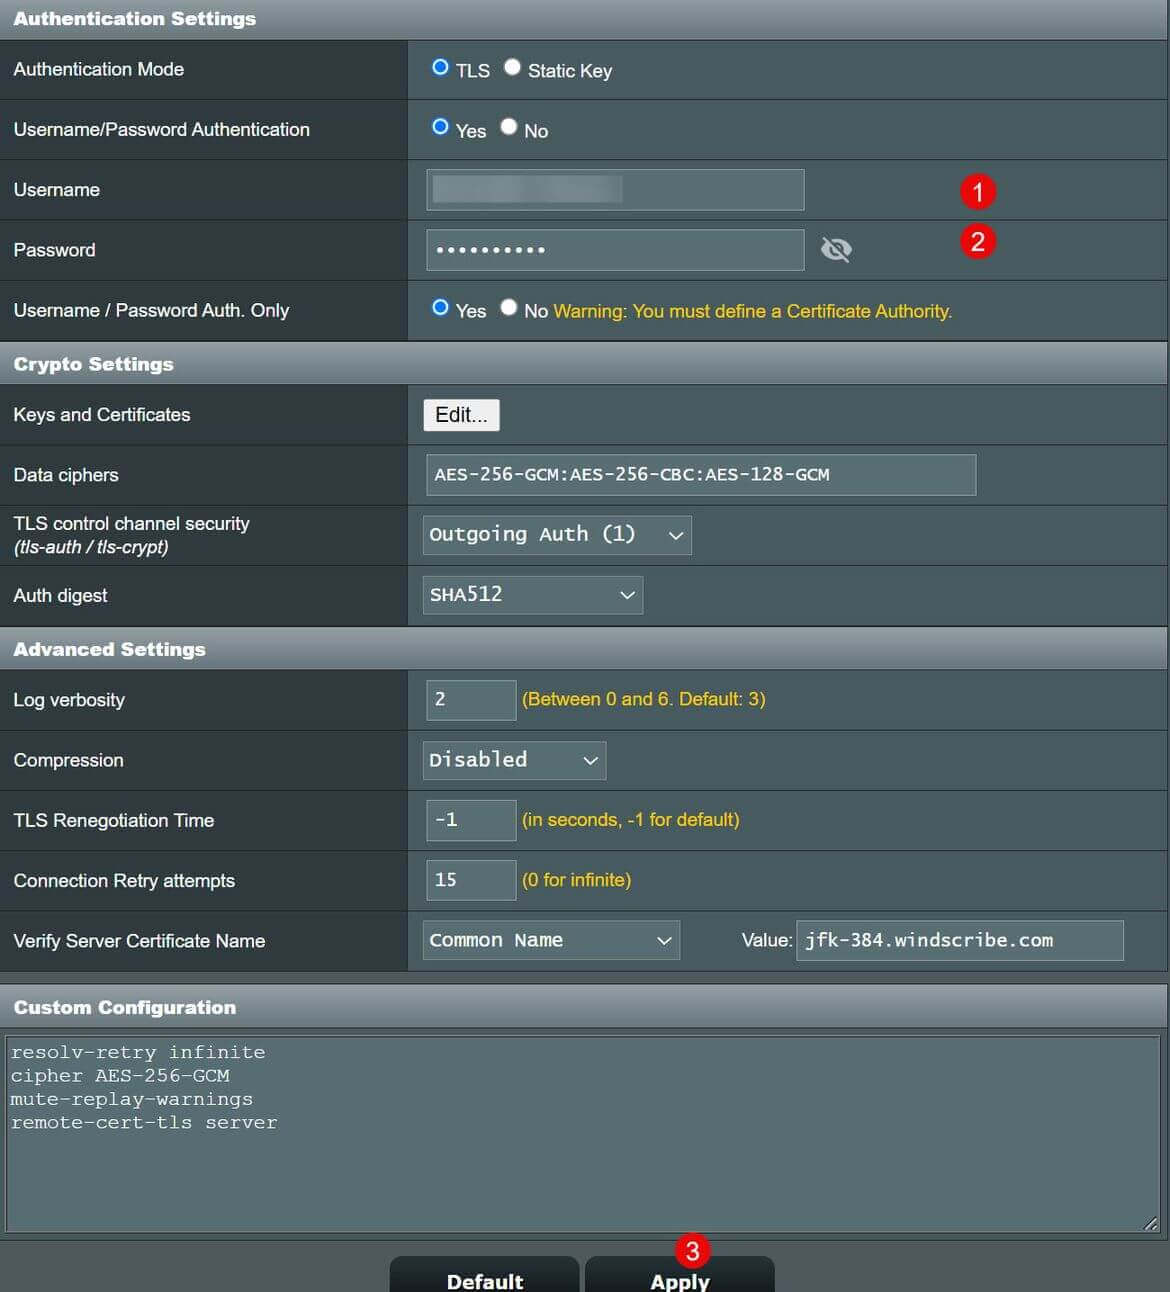
I need to enter the login credentials that I received from Windscribe’s configurator page. I will page down to the Authentication Settings area. In the Username field, I will enter my username. In the Password field, I will enter my password. I will select the Apply button at the bottom of the page to save the settings.
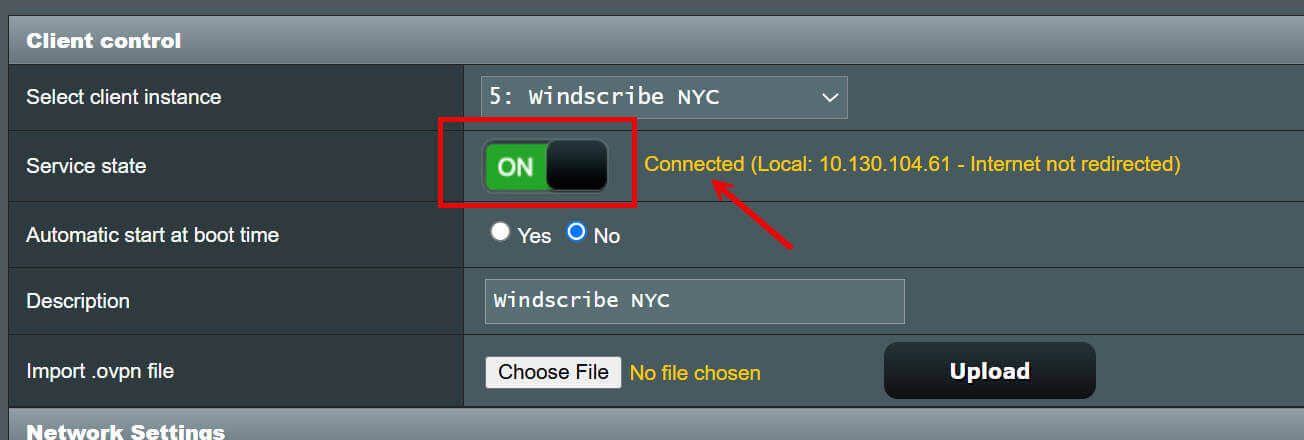
I need to test the VPN Client’s connection to Windscribe’s NYC VPN server. Go back to the Client control area and toggle the Service state button to ON. If everything worked, I should get a message that the client connected to the server.
Now I am going to make some changes to the default settings.
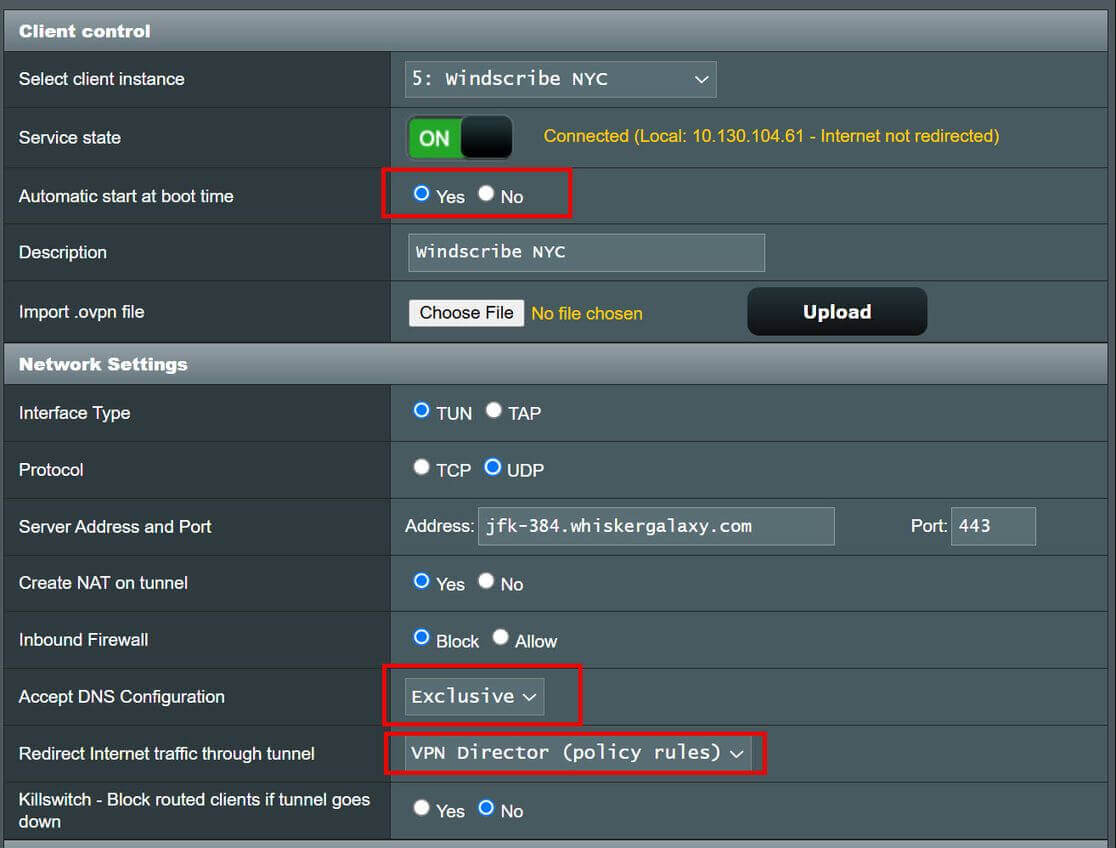
In the Client control area, I am going to change the Automatic start at boot time to Yes. This will start the VPN client every time the router boots.
In the Network Settings area, I need to decide how the router will handle DNS servers pushed by the remote VPN server. In the Accept DNS Configuration field, I am going to choose Exclusive. All DNS servers will be routed through the VPN tunnel. This should ensure that there are no leaks in the DNS queries.
In the Network Settings area, I need to decide how the router will handle internet traffic. If I select No, no traffic will go through this VPN client. If I select Yes, all traffic will go through this VPN client. I am going to select VPN Director (policy rules) because I want to control what internet traffic will go through this VPN client and what traffic will not go through it. Remember to click the Apply button at the bottom of the page to save the settings.
How do you create rules to get traffic to the VPN client? How do you manually assign an address to a device on the network? I’ll explain these concepts in Part 3 of this article. Stay tuned!
- Adding A VPN To A Home Network – Part 1
- Adding A VPN To A Home Network – Part 2 ⬅ You are here
- Adding A VPN To A Home Network – Part 3
- Adding A VPN To A Home Network – Part 4
—