If you employ Styles in your Word 2010 document (and I hope you do!), and have your document organized with headings defined by Word, you can use the Outline view to move through your document.
For example, suppose you have a rather large document and you would like to move quickly to a certain part. You remember the heading style you used but you cannot remember the exact verbiage. So that rules out using the Find feature.
But all is not lost! You can use the Outline view to find that location!
Follow the steps below to learn how:
- Display the View tab of your Ribbon.
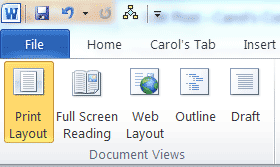
- In the Document Views group, click on the Outline tool or click the Outline button on your Status bar.
- Your screen will change and the Outlining tab will appear on your Ribbon.
- Use the Show Level drop-down list to select Level 1. All text except first level headings will appear.

- Read through and find the area you want.
- Position your cursor on that heading.
- On the View tab of your Ribbon, in the Document Views group, select Print Layout or click the Print Layout icon on your Status Bar.
Your cursor should now be in the area where you wanted it.